Feeds:
Posts
Comments

Archive for October, 2008

I asked my husband to trim our pooches cuz they were getting scruffy-looking but I think he went a little overboard on our dog Sandy (the sandy-colored one on the right).  Shatzie looks pretty good because I told him to leave her head to me (cuz she’s a little wiggler and I worry about injuries when cutting around her face) BUT I think he went a little “Britney Spears” on Sandy. 

Well, I guess I DID say to cut more off this time cuz she looked too bushy, like a sheep!  That’s not the case NOW!  Ay Yay Yay!  Mea culpa!  

BEFORE being "sheared"

BEFORE


AFTER

AFTER


S’ok, Sandy is the tomboy anyway and everyone thinks she is a boy…so, this haircut kinda fits her personality…   🙂

Read Full Post »

Alison, one of my fellow Twitter Foodies, was asking us what dish was a “must” at Thanksgiving.  We discussed that very topic last Thanksgiving at Cooking (dot) com where I am a Moderator of their very informative and lively forum.  (A moderator simply keeps away the “bad” guys and makes sure the forum discussions remain within community guidelines.  It’s a fun “job”!)

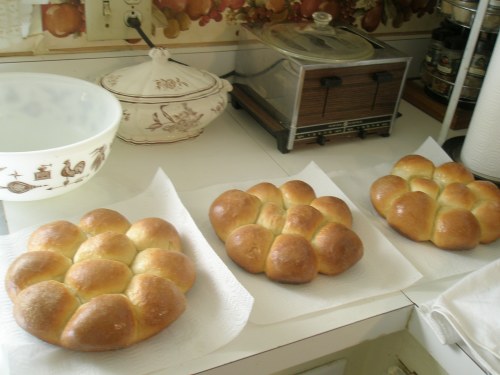
Anyhow, like Alison, I don’t want to even HEAR the whining that would occur if I didn’t show up with my fluffy yeast rolls.  My mom is REQUIRED to make her Cranberry Fruit Salad, my older sister can’t show up without the Sweet Potato dish and my huz is always assigned the task of making Ambrosia and Green Bean Casserole (and he’ll NEVER substitute plain green beans for the French Style my family likes again!  Yikes! Did he hear about it!)

Wow, we’re gonna be in November already in just a few days!  I’m sorry, I’m just not ready for this yet!

(Here’s a few pix from Thanksgivings past. That’s my MOM in the top picture, the middle shot is of my sisters and I frantically cutting the turkey & making gravy, then we have my Mom’s pretty table and the famous rolls!)


Don't Forget the Rolls!

Buttery Yeast Rolls

6 to 7 cups Bread Flour
1/4 cup sugar
2 tsp salt
2 pkgs active dry yeast
1 cup water
1 cup milk
1/2 cup butter
1 egg
In large bowl, combine 2 cups flour, sugar, salt and yeast; blend well.
In small saucepan, heat water, milk and butter until very warm (120º to 130ºF). (Get a quick read thermometer.) Butter does not need to melt completely. Add warm liquid and egg to flour mixture. Blend at low speed until moistened; beat 3 minutes at medium speed. By hand, stir in 2 to 3 cups flour to form a stiff dough. On floured surface, knead in 1 to 2 cups flour until dough is smooth and elastic, about 10 minutes. Place in greased bowl, cover loosely with plastic wrap and cloth towel. Let rise in warm place until light and doubled in size, about 1 hour.
Punch down dough. Let rest on counter, covered with inverted bowl for 15 minutes. Prepare your pans. Lightly grease 3 pie plates. I like the pie plate because of the nice shape they come out in and the recipe seems to always make enough to make 30 rolls (10 per pie pan) but you can also put them on a cookie sheet. Shape the dough into balls about 2 inches across (grab a handful of dough and squeeze a fist which makes the dough come out perfectly round as it squishes through the hole that is created between the thumb and first finger or pinch some dough off and flatten it in the palm of your hand and bring up the edges up to the center, then tuck them in).

At this point, you can either leave the rolls covered on the counter for the second rise (about 30 minutes), OR you can prepare them to be refrigerated. To prep them, lightly brush rolls with oil and cover loosely with plastic wrap. Refrigerate 2 to 48 hours. When ready to make them, remove from refrigerator and let them rise for about 40 minutes. Heat oven to 375ºF. Bake for 18 to 20 minutes or until golden brown. Remove from pans and immediately rub them with melted butter. Cool on racks.


Don’t be afraid to try it! It seems longer than it really is…I just try to be thorough in my recipes…
Above 3500 feet, reduce first rise time to 30 to 45 minutes


Read Full Post »

I meant a Lemon “type” of sour mood!  I LOVE lemons – in fact, too much so.  One time, on a routine visit,  my dentist asked me if I perhaps liked lemons…I told him YES!  Love ’em! I eat them raw, I squeeze lemons in my tea, into my Albondigas & Menudo soups, over Spanish Rice or Fried Rice, I love salad with Lemon Vinaigrette and on and on.  He told me that he could tell because it was starting to affect the enamel on my teeth.  Sigh!  I just replied, “Oh well, I’ll just have to live with the consequences because I’m not giving up my LEMONS!”  🙂

I took some lemon bars over to some friends house Monday before we headed out to “taste-test” a new Burger Place in town.  I wanted to get their opinion on using Meyer Lemon juice (from my dwarf Meyer Lemon tree out back) for the traditional lemon bar.  The recipe called for 3 TBSP of lemon juice, so I used 2 TBSP Meyer lemon juice and 1 TBSP regular lemon juice. We pretty much agreed that using the traditional style of lemon is probably better.  Oh, they were good enough I guess but lacked the usual tartness I’m used to. Both Caron and Nicole like lemon zest in theirs but I’m not a fan of zest of any kind (orange, lemon, lime, etc.).  Of course, having zest in some lemon bars would NOT PREVENT me from sampling them!  Know whut I mean, Vern?

So, here’s my attempt at making your mouth pucker…

2008-10-28b-005 

Well, did it work?  Is extra saliva filling the space under your tongue?  Ha!

How about sharing a link back to your favorite Lemon recipes? (Okay, I know you’ll think I’m weird when I tell you I don’t like Lemon Meringue…but you can skip those!)  🙂

Read Full Post »

Maybe it’s because they don’t want us to trudge through the quagmire of learning how to blog that the Blogger community is filled with so many helpful people!  I am still absorbing all the different tools available to us – wow, it’s a lot to learn! Honestly, I feel like I did when I first started in the mortgage business umpteen years ago because blogging, like learning the mortgage trade, has a TON of acronyms, phrases and tech-speak gobbledygook (that’s a techie term, right?).  All of it keeps my head spinning.  BUT, unlike when I started in mortgages, people aren’t leaving me to learn it all on my own.  When I see a post asking a technical question, I notice tons of people chime in with their advice and solutions.

I love, love, love the photography that accompanies the blogs, and in particular, the food blogs.   I’ve been inspired to finally get out the manual that came with my nice Nikon Digital SLR and try to finally figure out all the buttons and settings.  The biggest challenge to me is lighting.  For one thing, I’m a nightowl so if I am baking something at night, there isn’t a whole lot of “natural” ambient light to use for my photos.  But, again, some bloggers have provided hints and advice to solve that challenge.

In particular, I was pleased at all the information that I gleaned from this helpful blogger: http://veganyumyum.com/2008/09/food-photography-for-bloggers/.  After reading her helpful hints, my photos went from looking like this:


To this:

Or like this:


Not where I want it yet but looking a heckuva lot better than the picture above it, right?

I also got some great tips regarding lighting from Jaden at Steamykitchen.com which will help solve my “vampire-like” nocturnal light challenges.  See: — http://tinyurl.com/4gcl7d

 I hope that soon you’ll find my photos more appetizing and less under and over-exposed.  For the next few weeks, though, I think I’ll have to use up my “untrained” group of photos so that you can see my recipes before the upcoming holidays.  i think there are some that might be useful for you.

Read Full Post »

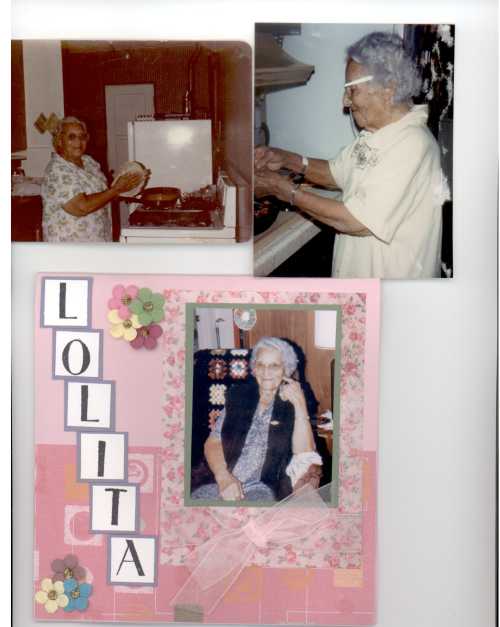
Being under the weather, I’m trying to think of things that are comforting.  For some reason, my Nana (my maternal grandmother) has been on my mind a LOT lately.  Maybe her spirit is trying to soothe me.

Nana always had something on the stove that filled her humble little house with the BEST aromas! She was well-known in the little border town of 10,000 I grew up in.  Every Sunday she would prepare mass quantities of food to be sold after the services to those hungry souls who’d fasted before coming to church.  My grandmother never had a car but never needed one as someone would stop and give her a ride when they saw her walking to and from the grocery store or other destinations.  Her hobbling gait that could best be described as being like the back and forth motion of a metronome,  made her easy to spot as people were driving.  I was amazed at her ability to prepare these huge pots of menudo (tripe soup), breakfast burritos, and delicious machaca (shredded beef) burritos along with homemade salsa and chorizo (mexican sausage) .   Her energy level always left me in awe.  You know, they tasted EXACTLY the same, week after week.  I strive to have that consistency but she set a high standard that I have yet to meet.

Recently I made my “budget” empanadas that were just like the machaca-filled ones that my Nana always made but I filled them with picadillo (pronounced peek-ah-THEE-yo) which is a hamburger, potato, onion, green pepper mixture that fills the stomach and doesn’t empty the pocketbook.

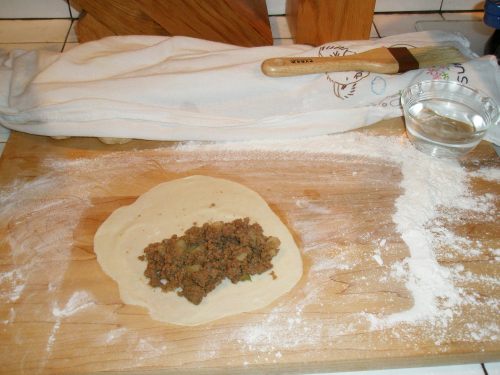
Look tempting?  Here’s how you make ’em…


Little dough balls are prepared and kept moist under floursack towel

Little dough balls are prepared and kept moist under floursack towel

Filling is added leaving a 1 1/2" margin for crimping
Moisten the edges & crimp edges

Moisten edges & crimp


Ready to hit the hot oil

Ready to hit the hot oil

My sweet Nana

My sweet Nana


I’ve seen some amazing food blogs and I feel a little inadequate because I don’t purport to be a great photographer OR writer.  I just want to share my love of food, much in the same way my Nana did.  I can’t invite you to my home to share, so I hope you enjoy these pages!

Empanadas


3 cups of all purpose flour (LA PIÑA brand is preferred)

1 tsp. salt

3 Tablespoons Crisco shortening (original recipe called for lard)

1/2 c. warm water

1/2 c. milk


Spoon flour lightly into measuring cups. Add salt to flour. Cut in the shortening using a pastry cutter or fork until mixture resembles small peas.  Add milk/water mixture a little at a time until the dough holds together. Knead it just a little to get it soft and smooth. If it’s not, add a little more shortening to the palm of your hand and incorporate into dough to make it a soft dough. 


On a large wooden cutting board, form little balls about the size of a ping-pong ball.  Cover them with a dampened flour sack dishtowel and let them rest for at least 30 minutes.  Roll out into a circle about 5 to 6 inches across and place meat mixture in the center.  Leave a 1″ space around the edge.  Moisten with water and fold the bottom edge over the top and keep crimping all the way around to make a good seal.  Fry in hot oil or Crisco.


The hamburger (picadillo) filling can be made whatever way you choose.  The basic ingredients are 1 1/2 lbs. hamburger, 2 medium-size finely diced russet potatoes, 1/4 cup finely diced green pepper (or Anaheim chili) , 1/4 cup finely diced onion, 1/4 c. tomato sauce (if you can find El Pato brand, it adds a little kick to the meat) salt, pepper and garlic salt to taste.  Some people add olives to their picadillo or jalapenos, or raisins and other spices.  Feel free to come up with your own favorite!


Read Full Post »

Hi Protein Honey Wheat Bread

Making homemade bread is one of my favorite things to do and I HAVE to visit a bakery in any town I’m vacationing in…for ideas, inspiration and of course, bread.  What is your favorite type?

I’ve been making this Wheat Bread for 28 years now and it comes out perfectly every time!


Not too much flour on the board…

What do they say?  Smooth as a baby’s bottom?  Well, that’s impossible when you have Cottage Cheese in the mix.

Formed and Ready to be plopped into the oven.


 Voila!  The finished product!!!!!!!!!!!!!!!!


Hi Protein Wheat Bread

from Pillsbury Bread Flour Cookbooklet

circa 1979


4 to 5 cups Pillsbury Best Bread Flour

2 tsps salt

2 pkgs active dry yeast

1 cup water

½ cup honey

¼ cup butter

8 oz carton (1 cup) cream style cottage cheese

2 eggs

1 cup Wheat Flour

½ cup rolled oats

1 c. chopped nuts (optional)


Generously grease 2 – 8”x 4” loaf pans.  In large bowl, combine 2 cups bread flour, salt and yeast, blend well.  In medium saucepan, heat water, honey, butter and cottage cheese until very warm (120 degrees).  Add warm liquid and eggs to flour mixture.  Blend at low speed until moistened; beat 3 minutes at medium speed.  By hand, stir in wheat flour, oats and nuts, plus enough bread flour to form a soft dough.


On floured surface, knead dough about 10 minutes.  Place in greased bowl, cover loosely with plastic wrap and cloth towel.  Let rise until doubled in size (about 1 hour).  Punch down.  Divide into 2 parts, mold into balls.


Shape into 2 loaves.  Place in greased pans until dough is light and doubled in size, about 1 hour.


Bake for 35 to 40 minutes at 375 degrees.  Brush top of loaves with melted butter when you remove from oven.

Read Full Post »

Older Posts »