Feeds:
Posts
Comments

I belong to a large, international women’s organization and we like to camp a lot! We were given the original 8 can Taco Soup recipe and I tweaked it to be my own. There couldn’t be an easier, hearty soup recipe than this one where you basically dump it all into a large pot (we use Dutch ovens when camping). It’s definitely my husband’s favorite soup. We garnish it with Jack Cheese, diced avocadoes and cilantro. It tastes even better the 2nd day! Low cost too! Bonus!

Ingredients:

  • 1 (15 oz.) can black beans, drained
  • 1 (15 oz.) can BUSH’s Chili Beans
  • 1 (14.5 oz.) Roitel Original (or your favorite spiciness)
  • 1 (15.25 oz.) can Yellow corn, drained
  • 1 (12.5 oz.) can white chicken breast, drained
  • 1 (10.75 oz.) can cream of chicken soup
  • 1 (10 oz.) can green enchilada sauce (or ½ large can Las Palmas)
  • 1 (14 oz.) can chicken broth (I open a carton in case I need more liquid)
  • 1 packet taco seasoning 
  • INSTEAD of seasoning, I use 1Tbsp ground California Chili + 1 Tbsp ground New Mexico chili

Directions:

  1. Mix all ingredients together in a large pot.
  2. Heat until warm, stirring occasionally.
  3. Serve with diced Avocado, grated Jack Cheese, Tortilla strips (from the salad section) and cilantro garnish (optional)

NOTE:   This can be easily doubled.   Tastes even better the next day!  Makes about a ten 10 oz bowls.

You can use the taco soup envelope but I always have these two types of chili powder around. I add equal amounts of both. Add it to your taste. I add about a Tablespoon of each to the pot.

I hope you enjoy this easy, peasy and low cost meal!

I recently joined a Facebook group called Bayless’ Best Ever and the members have been posting some wonderful, homemade AUTHENTIC dishes for us to drool over.  Chef Rick posted a contest using his recipe for salsa (Chef Bayless Rustic Roasted Tomato Salsa) and we were supposed to make it (or a variant of it), add it to our dish and post about it.

Chef Rick Bayless Roasted Tomato Salsa

  • fresh jalapeño chiles (or 4 serranos or 2 habaneros or practically any fresh chile)
  • 3 garlic cloves, unpeeled
  • 1/2 cup finely chopped white onion
  • One15-ounce can diced tomatoes in juice (preferably fire-roasted)
  • 1/3 cup (loosely packed) roughly chopped cilantro
  • A teaspoon or so fresh lime juice or cider vinegar (optional)
  • Salt

Set a small skillet over medium heat. Lay the chiles and garlic in the skillet and dry roast until soft and blotchy in spots, about 10 minutes for the chiles, about 15 minutes for the garlic.

While the chiles and garlic are roasting, scoop the chopped onion into a strainer and rinse under cold water. Shake off the excess water and pour into a medium bowl.

Pull the stems off the roasted chiles and peel the papery skin off the garlic. Scoop them into a food processor and pulse until they are finely chopped. Add the tomatoes, with their juice, re-cover and pulse a few more times, until the mixture is as coarse or smooth as you want your salsa to be.

Pour the tomato mixture into the bowl with the onion. Add the cilantro and stir thoroughly. Thin with a little water if necessary to give the salsa an easily spoonable consistency. Taste and season with lime juice or vinegar, if using, and salt, usually about ½ teaspoon. If not using within an hour or two, cover and refrigerate.

IMG_2380

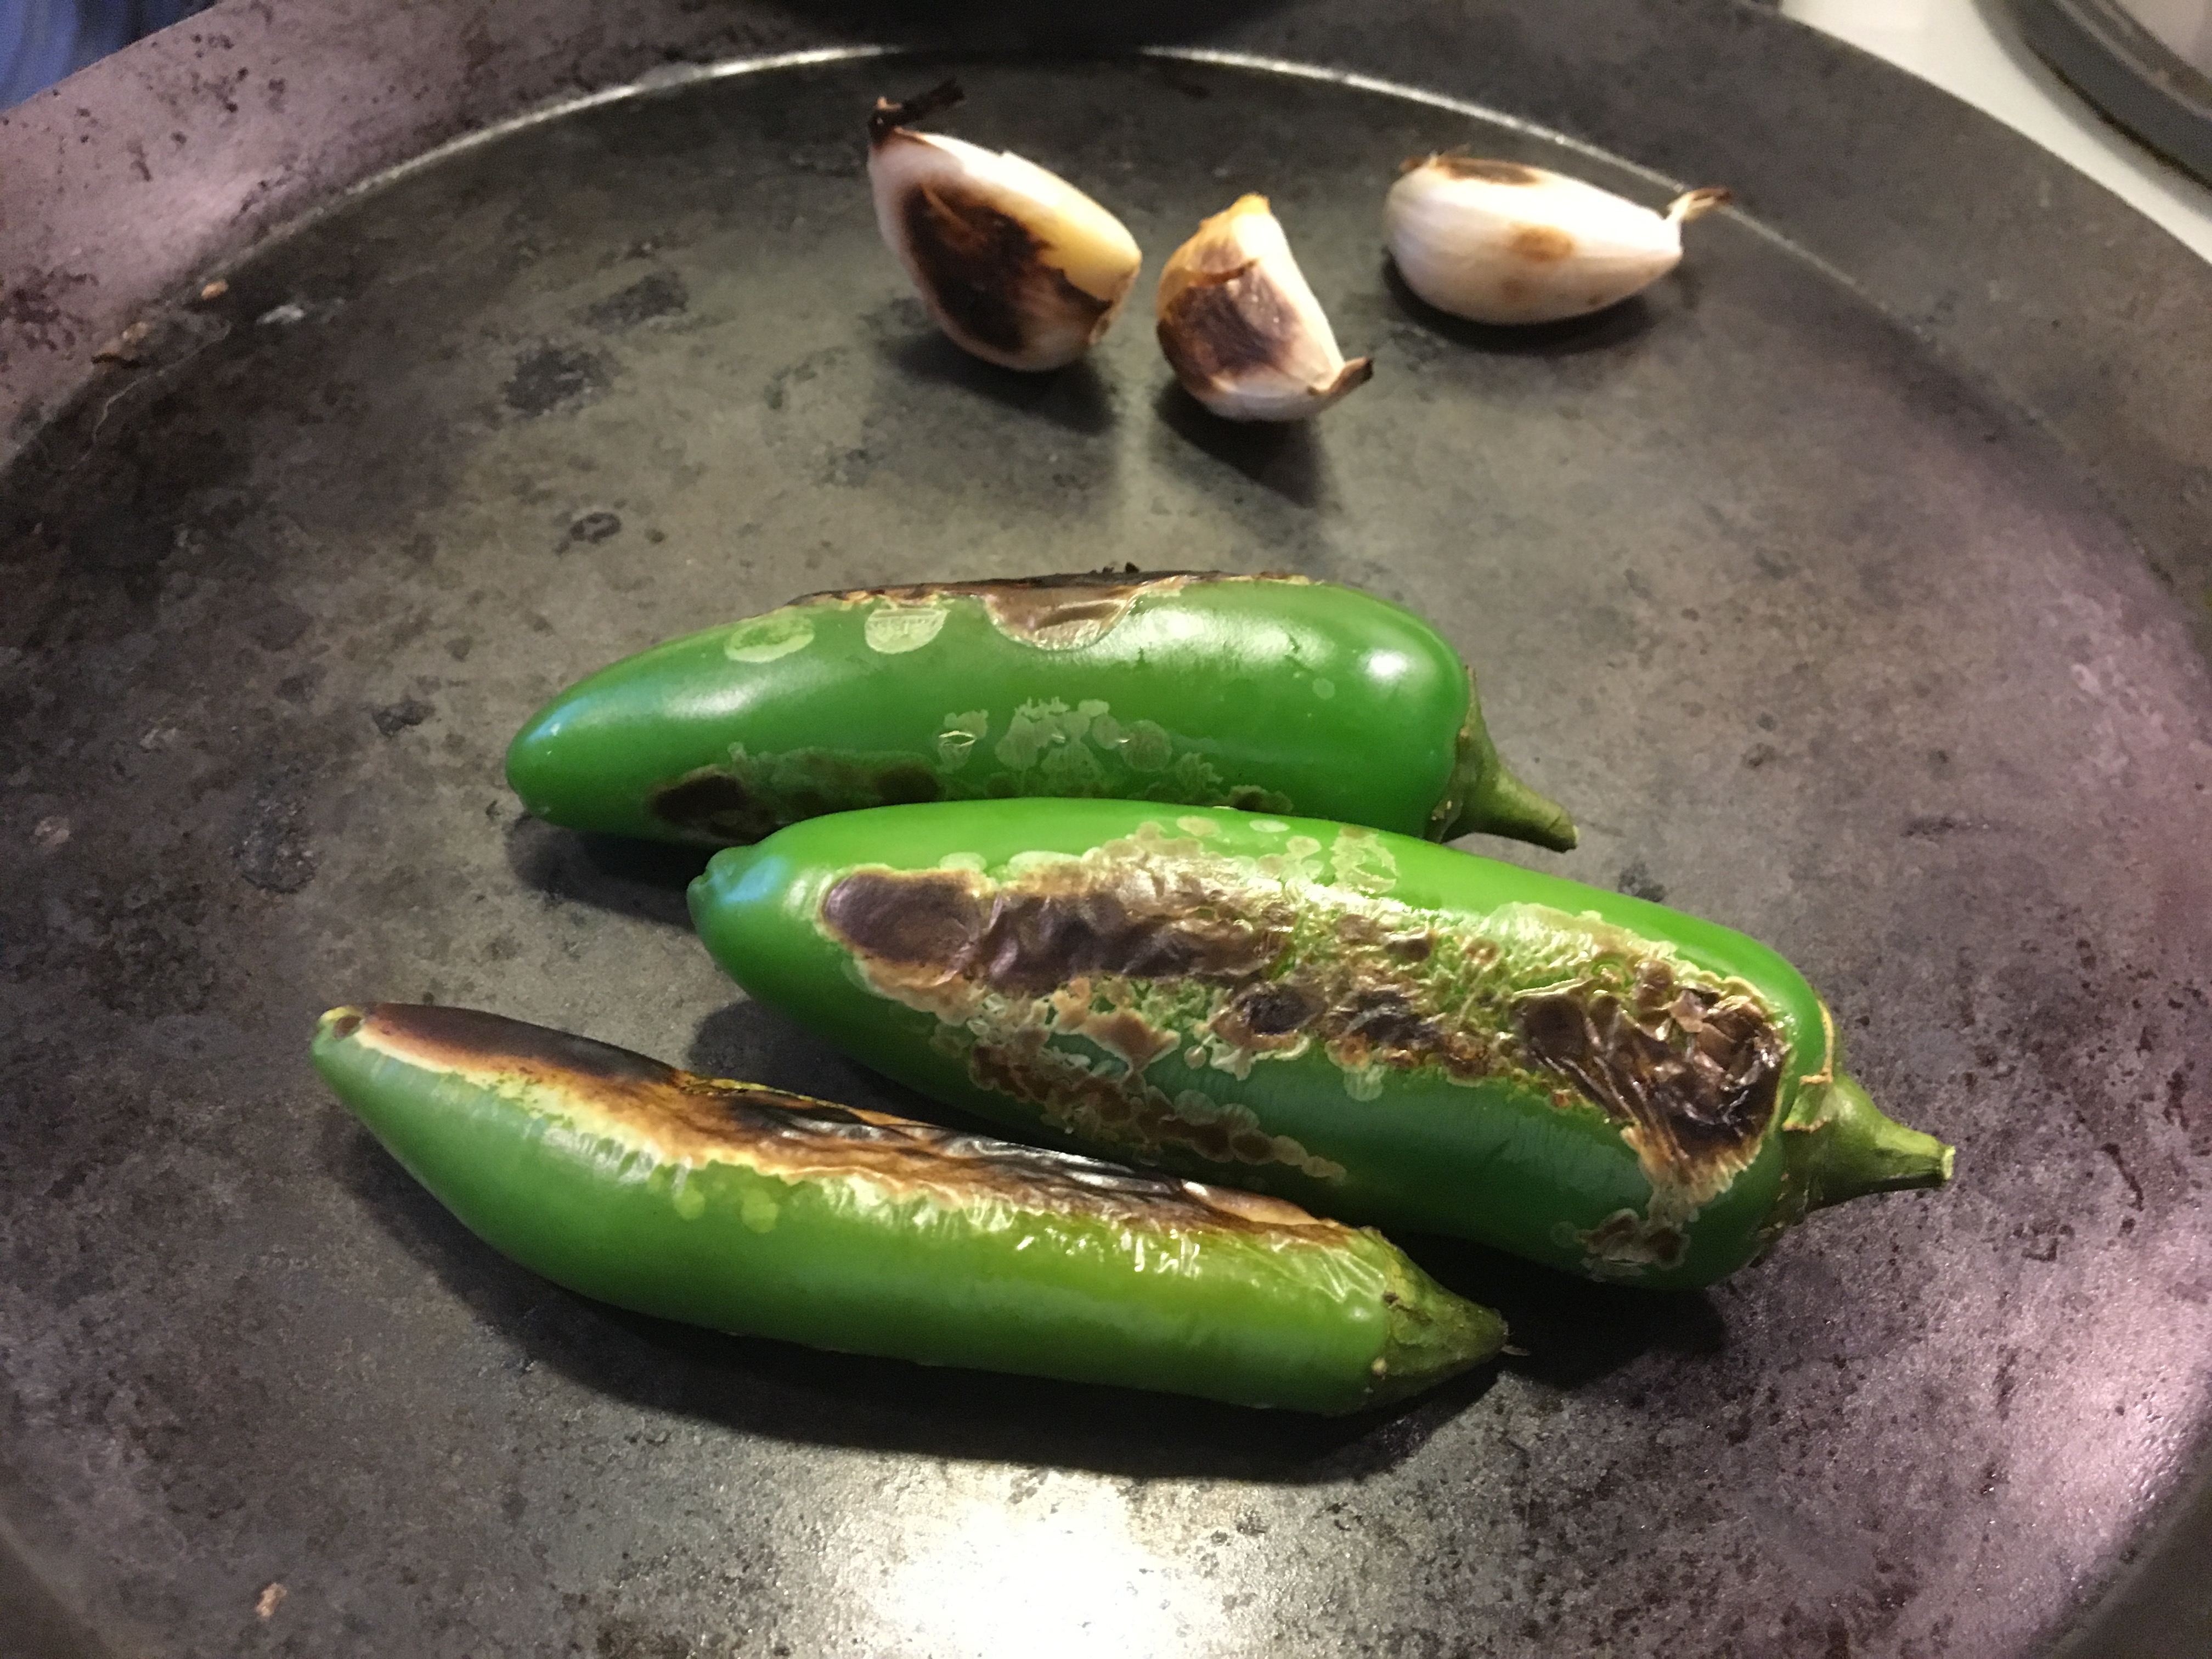
Roast the peppers on a hot griddle, blistering the skin for easy removal.

IMG_2384

IMG_2385

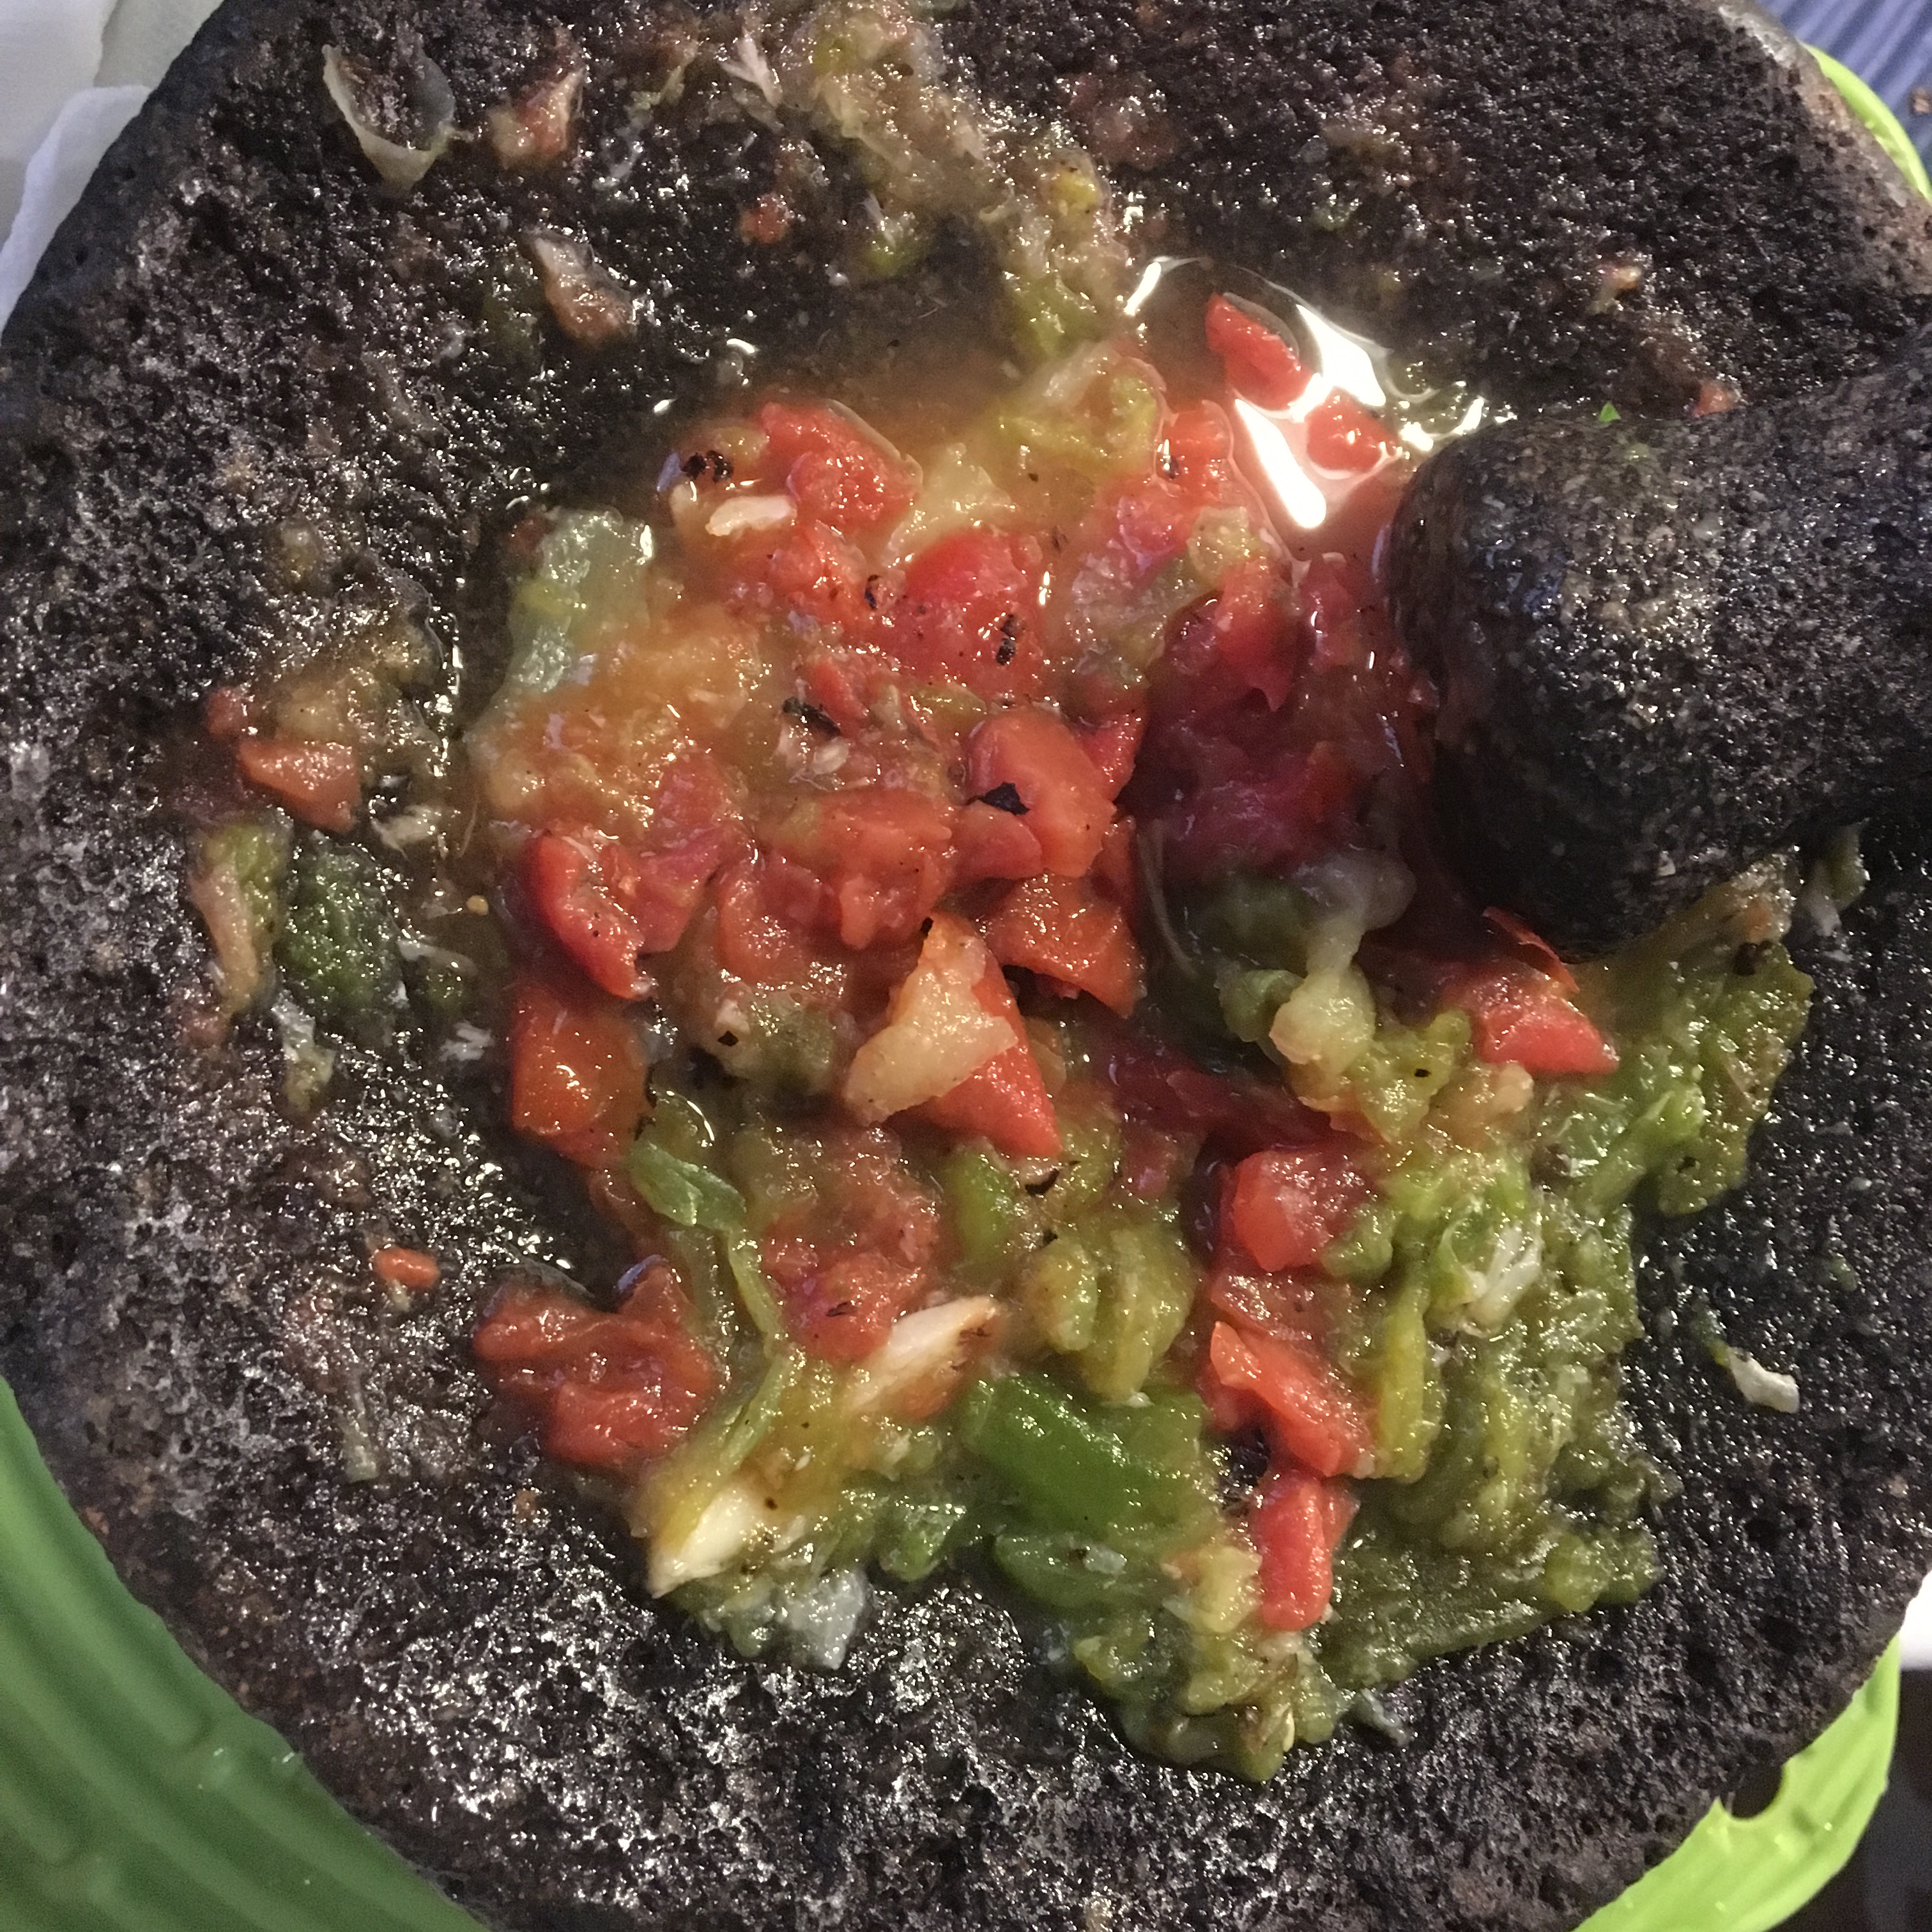
Roughly grind the chilis in a molcajete (volcanic rock mortar & pestle) OR give it a rough chop in your food processor.  Add the fire roasted tomatoes and the other ingredients in the recipe, especially the fresh cilantro.  I love the smell of fresh cilantro (I know, I know, some of you out there hate it!).  I tried to make this simple and used canned diced fire-roasted tomatoes.  The recipe calls for lime juice or cider vinegar, I used both!  Loved the flavor!

IMG_2387

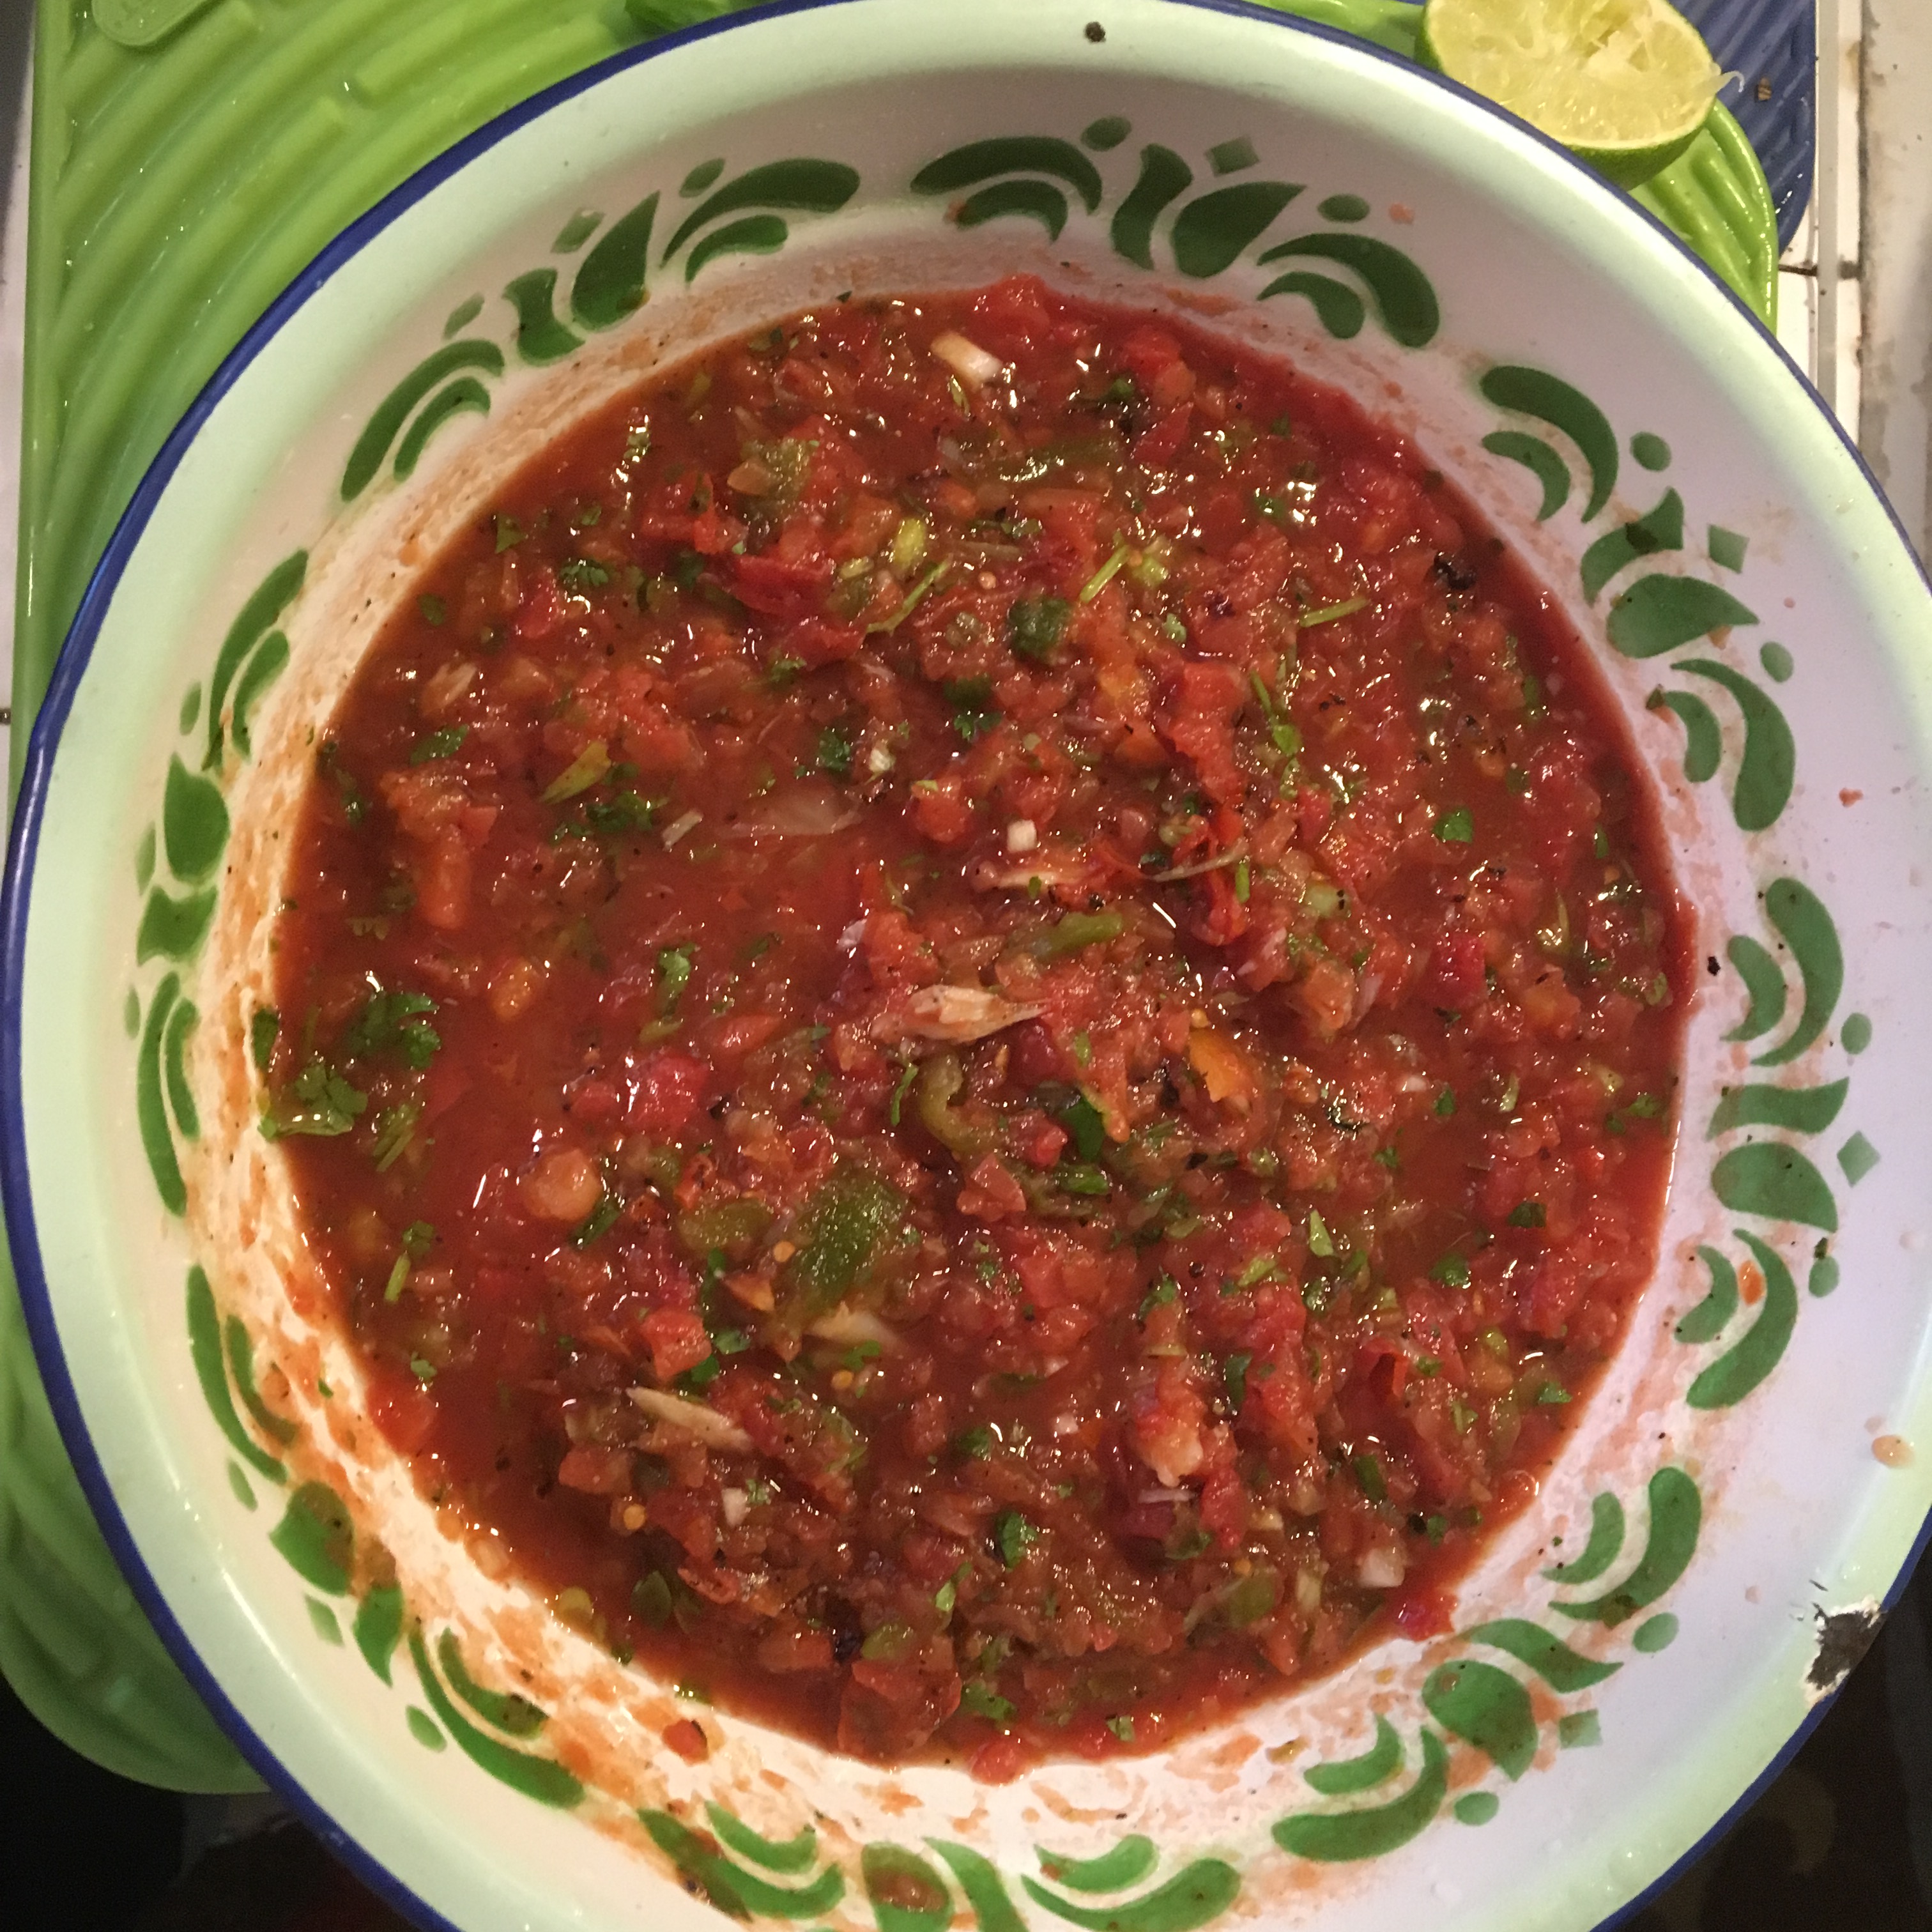
Here’s the finished product!  SO easy!

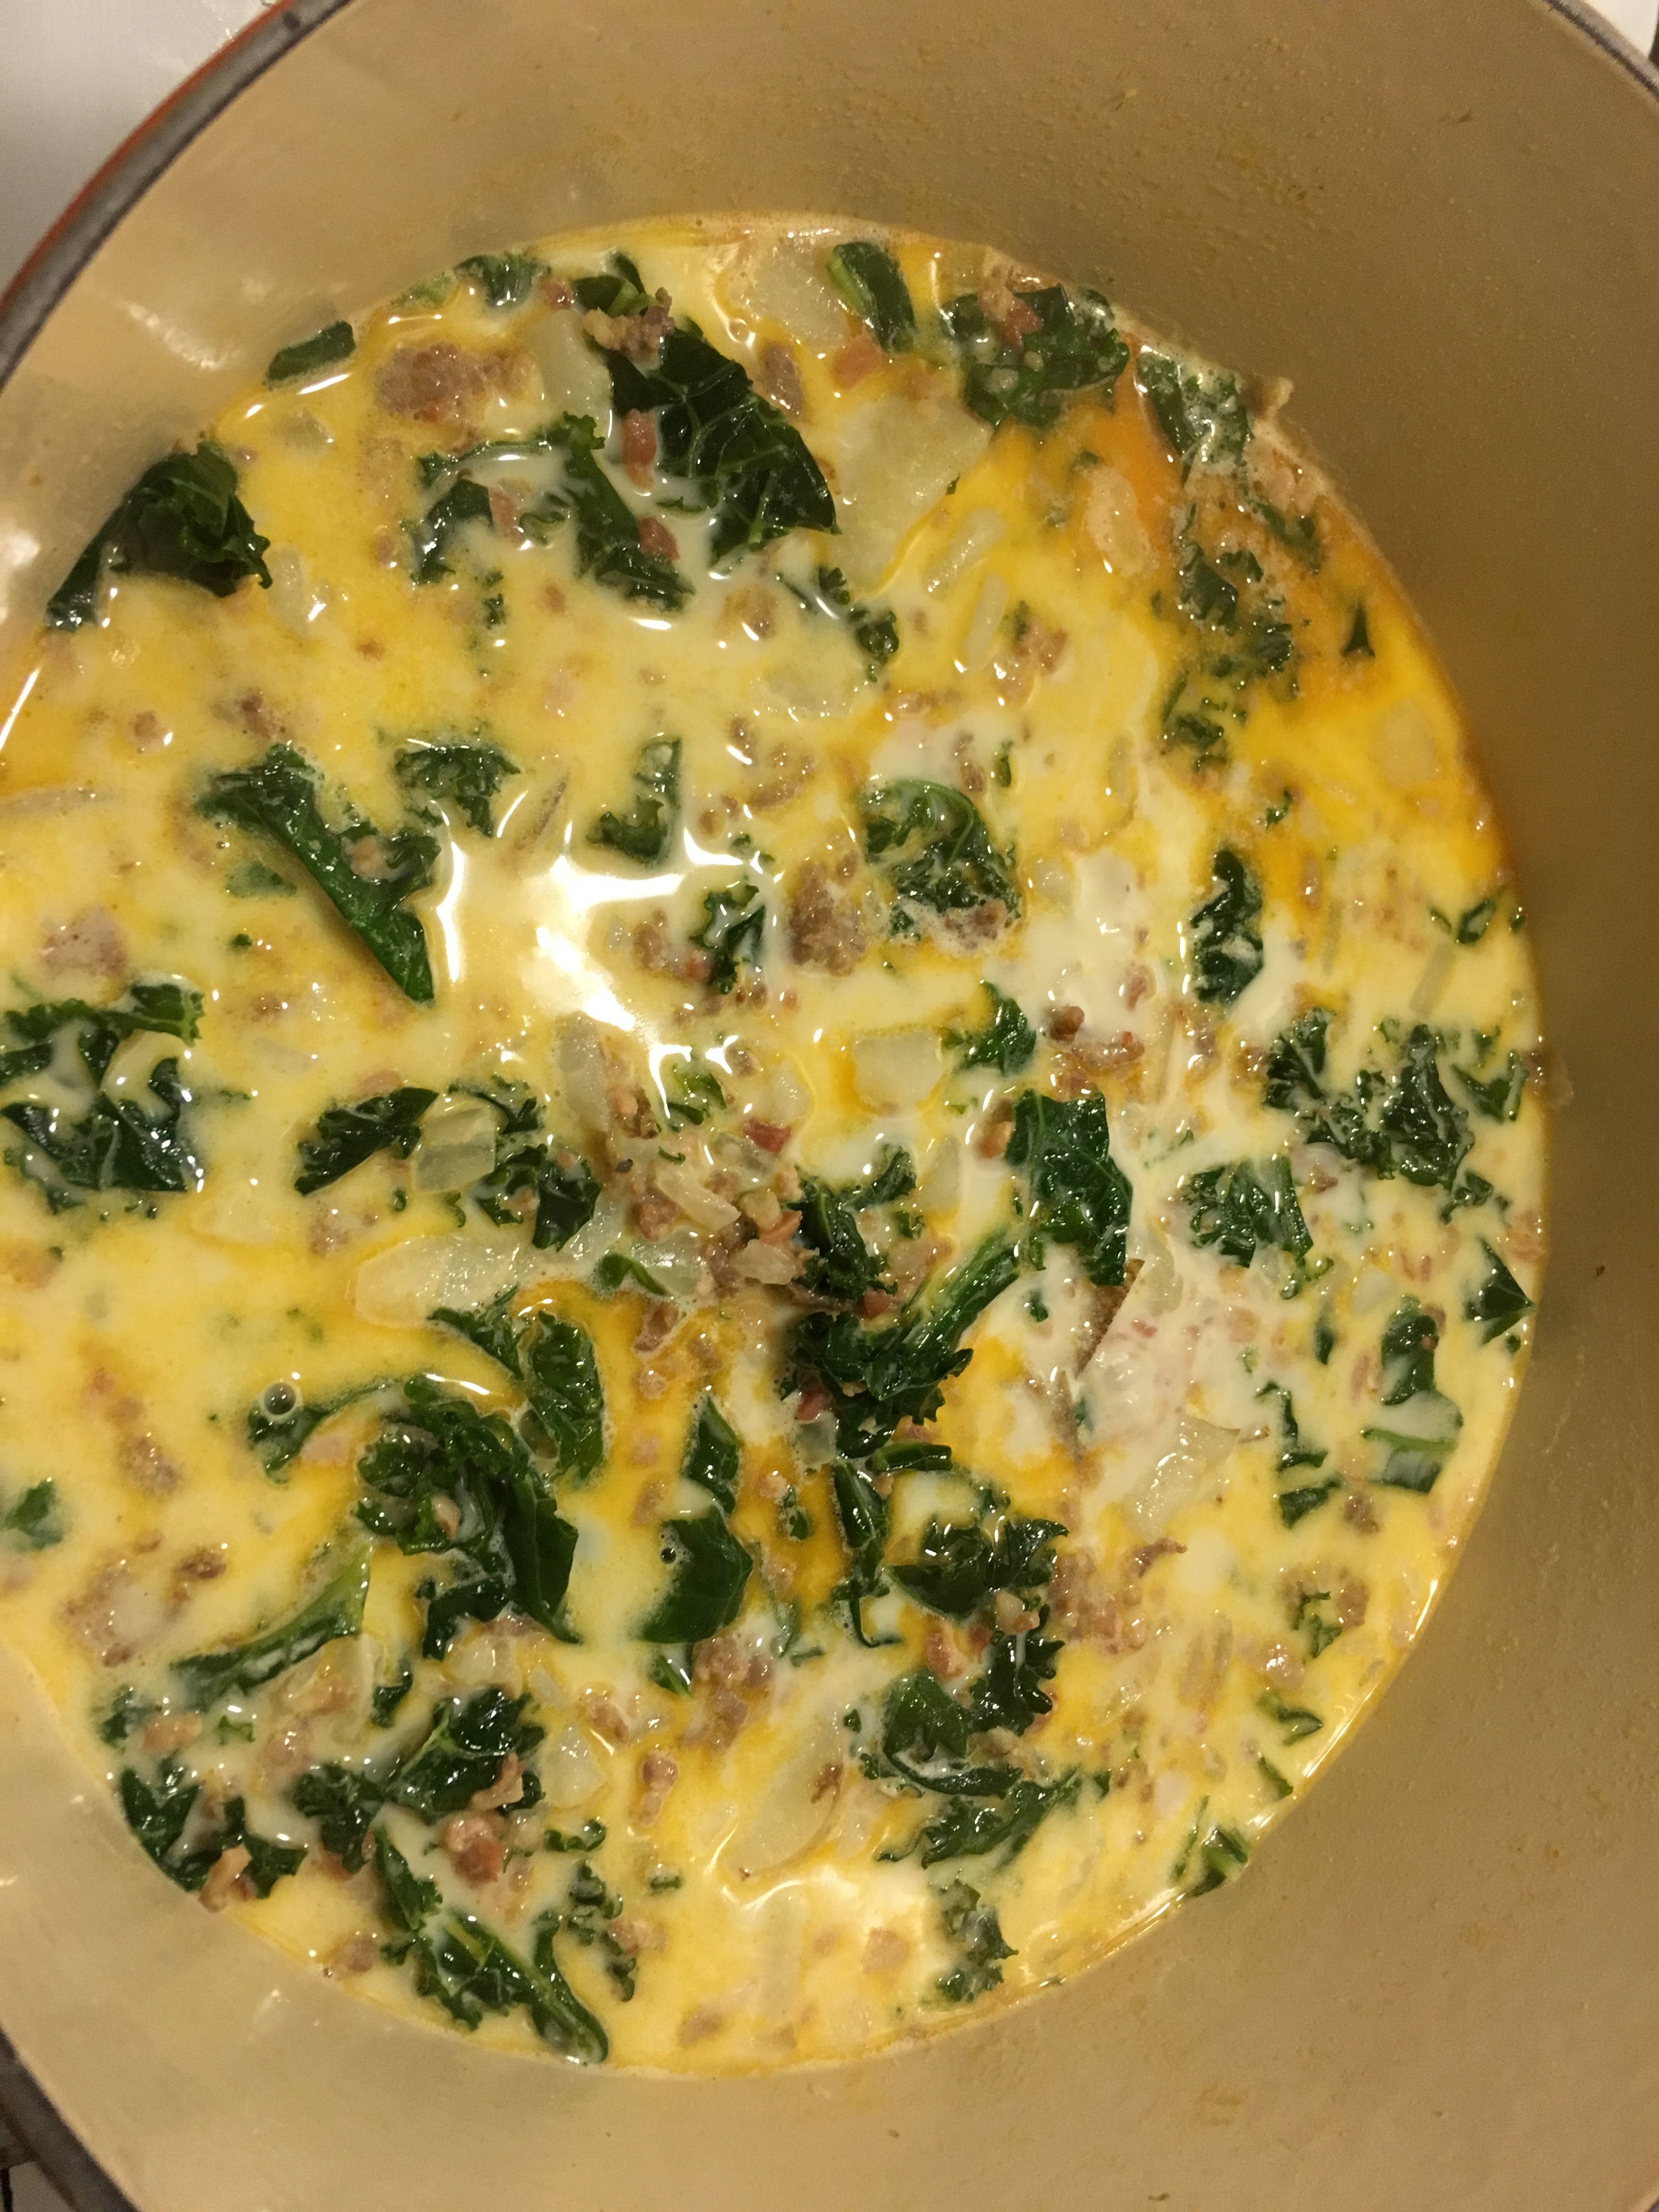
Coincidentally, I had made some machaca from scratch a few days ago and filled my chimichanga with the delicious meat.  This recipe was recently updated to reflect the batch I made at Christmas that came out fantastic!

MACHACA RECIPE:

2 to 3 lbs Beef Brisket (trimmed of most fat)

Sprinkle roast generously with Garlic Salt (about 1 tsp), finely ground black pepper (about 1 tsp) and 1/2 tsp salt

1 large or 2 small bay leaves

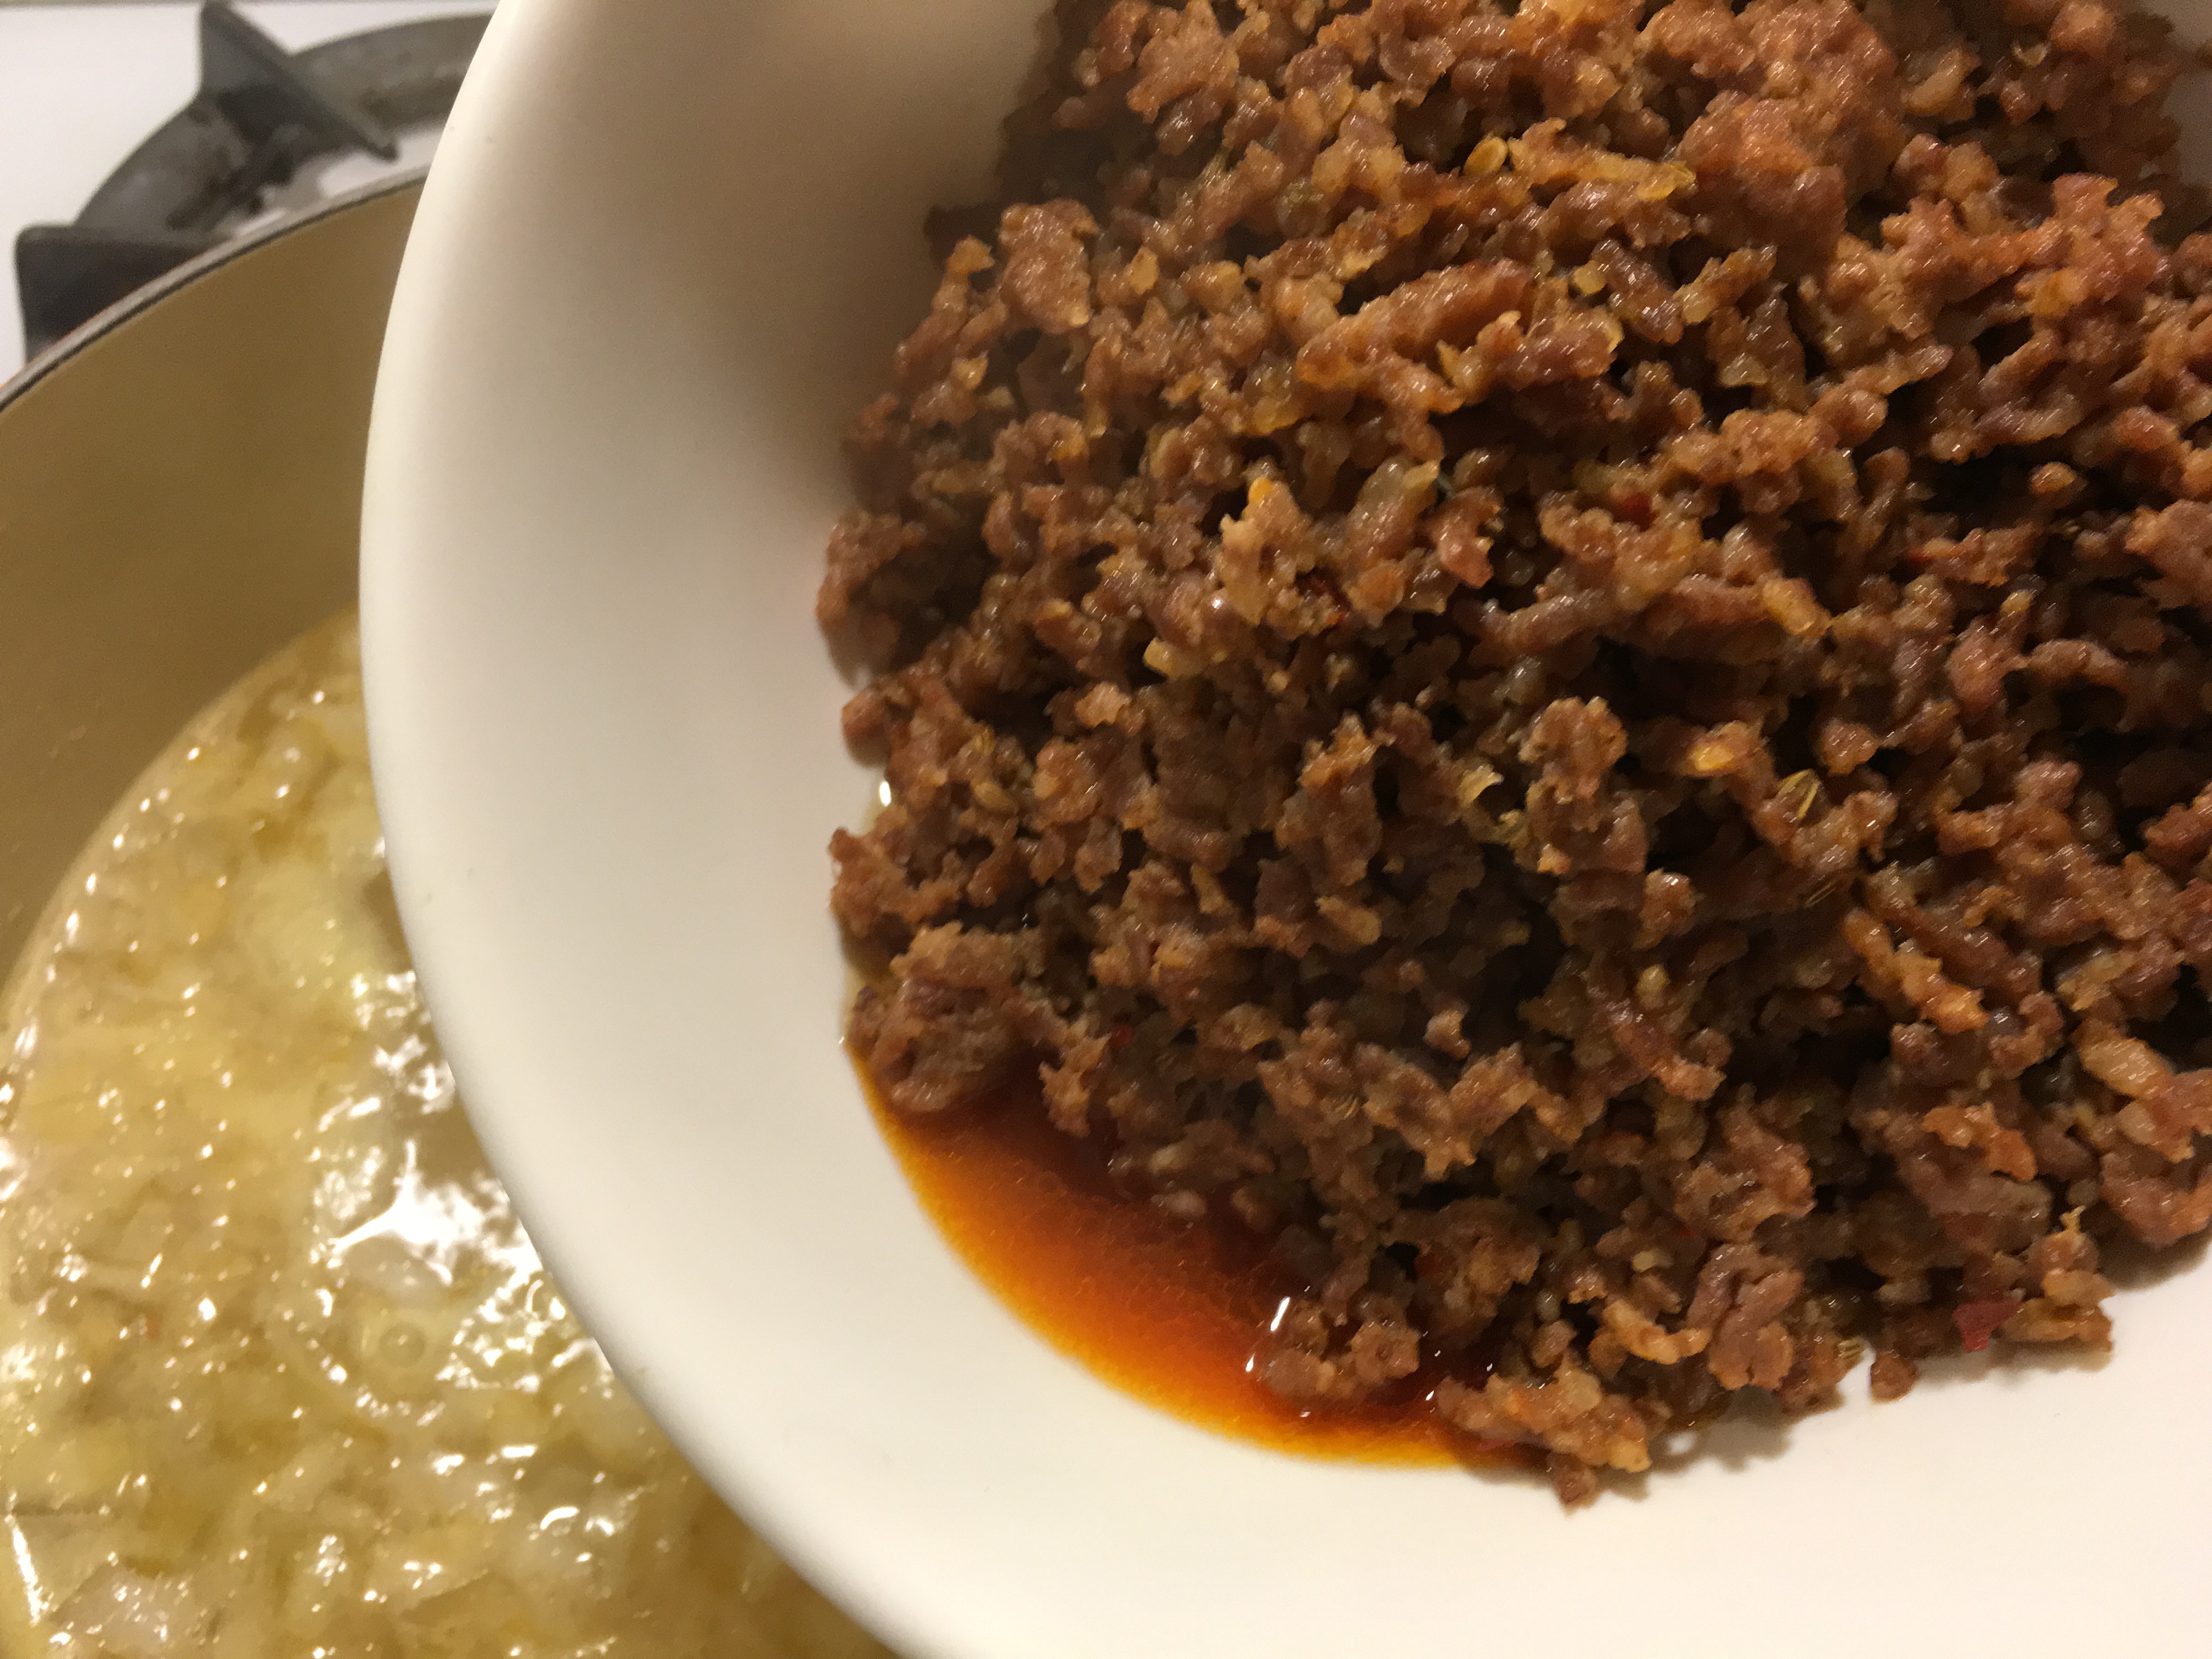
Cut the roast into big chunks (about 3 ” square).  Place the roast in a crock pot and cook on high for about 5 to 6 hours (or on low overnight for 8 hours).  Remove meat from the juicy broth that has been made and move to a plate or tray to cool off.   When it is cool, shred it with 2 forks and set aside.  Remove any visible fat chunks that remain from the brisket.  You can reserve the liquids and add later if necessary to add some flavor.

MACHACA ingredients:

1 Tbsp vegetable oil (or olive oil if you prefer)

1/2 medium white onion, diced

1/2 California  (Anaheim) chili pepper, diced

1/2 green bell pepper

2 garlic cloves, minced

2 Roma tomatoes, chopped (approx 1/2 pound)

1/4 teaspoon salt

ground pepper (to taste)

1 can Hunts tomato sauce

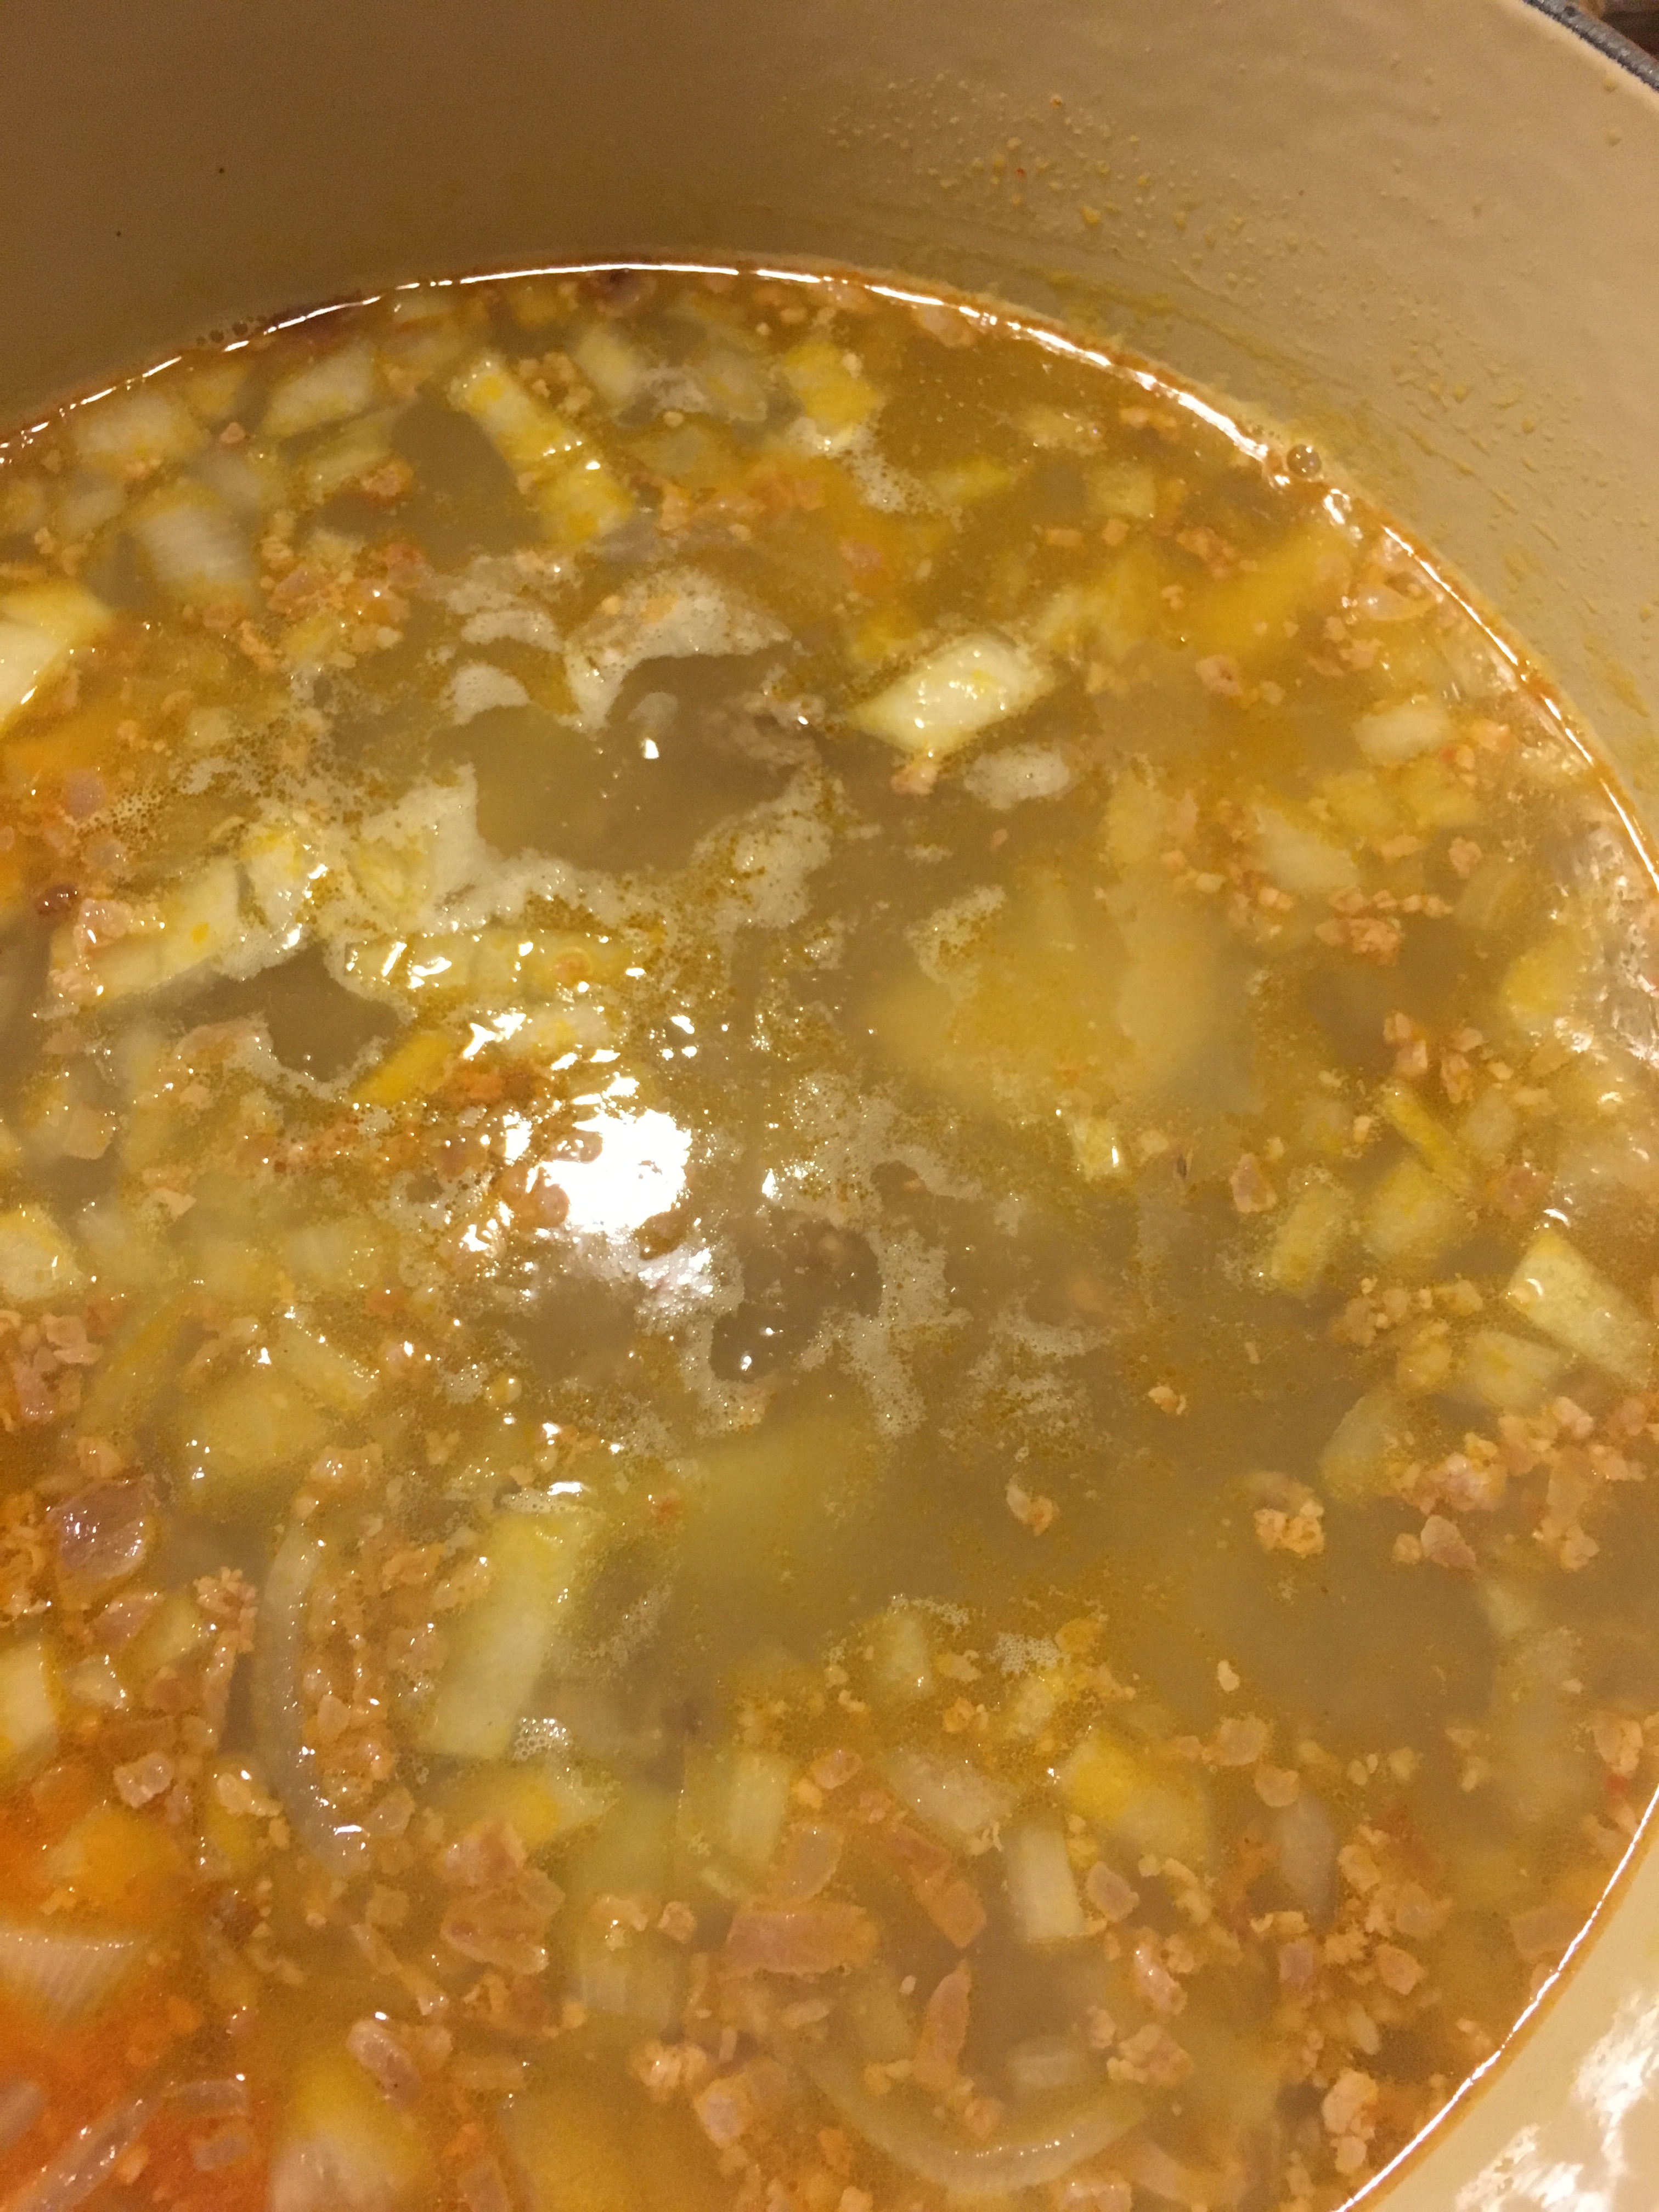
In large saute’ pan, put oil, onions, Anaheim chili and bell pepper.  Cook on medium heat until softened.  Add minced garlic, tomatoes and add salt and pepper.  Add shredded beef and tomato sauce.  If necessary, add more water or some of the juices from cooking the meat.

Reduce heat to a low simmer and let cook until vegetables are tender, about 20 minutes.   Add more salt or pepper if needed.  This is even better the next day which allows the flavors  of the veggies to meld with the meat.

IMG_2329

IMG_2424

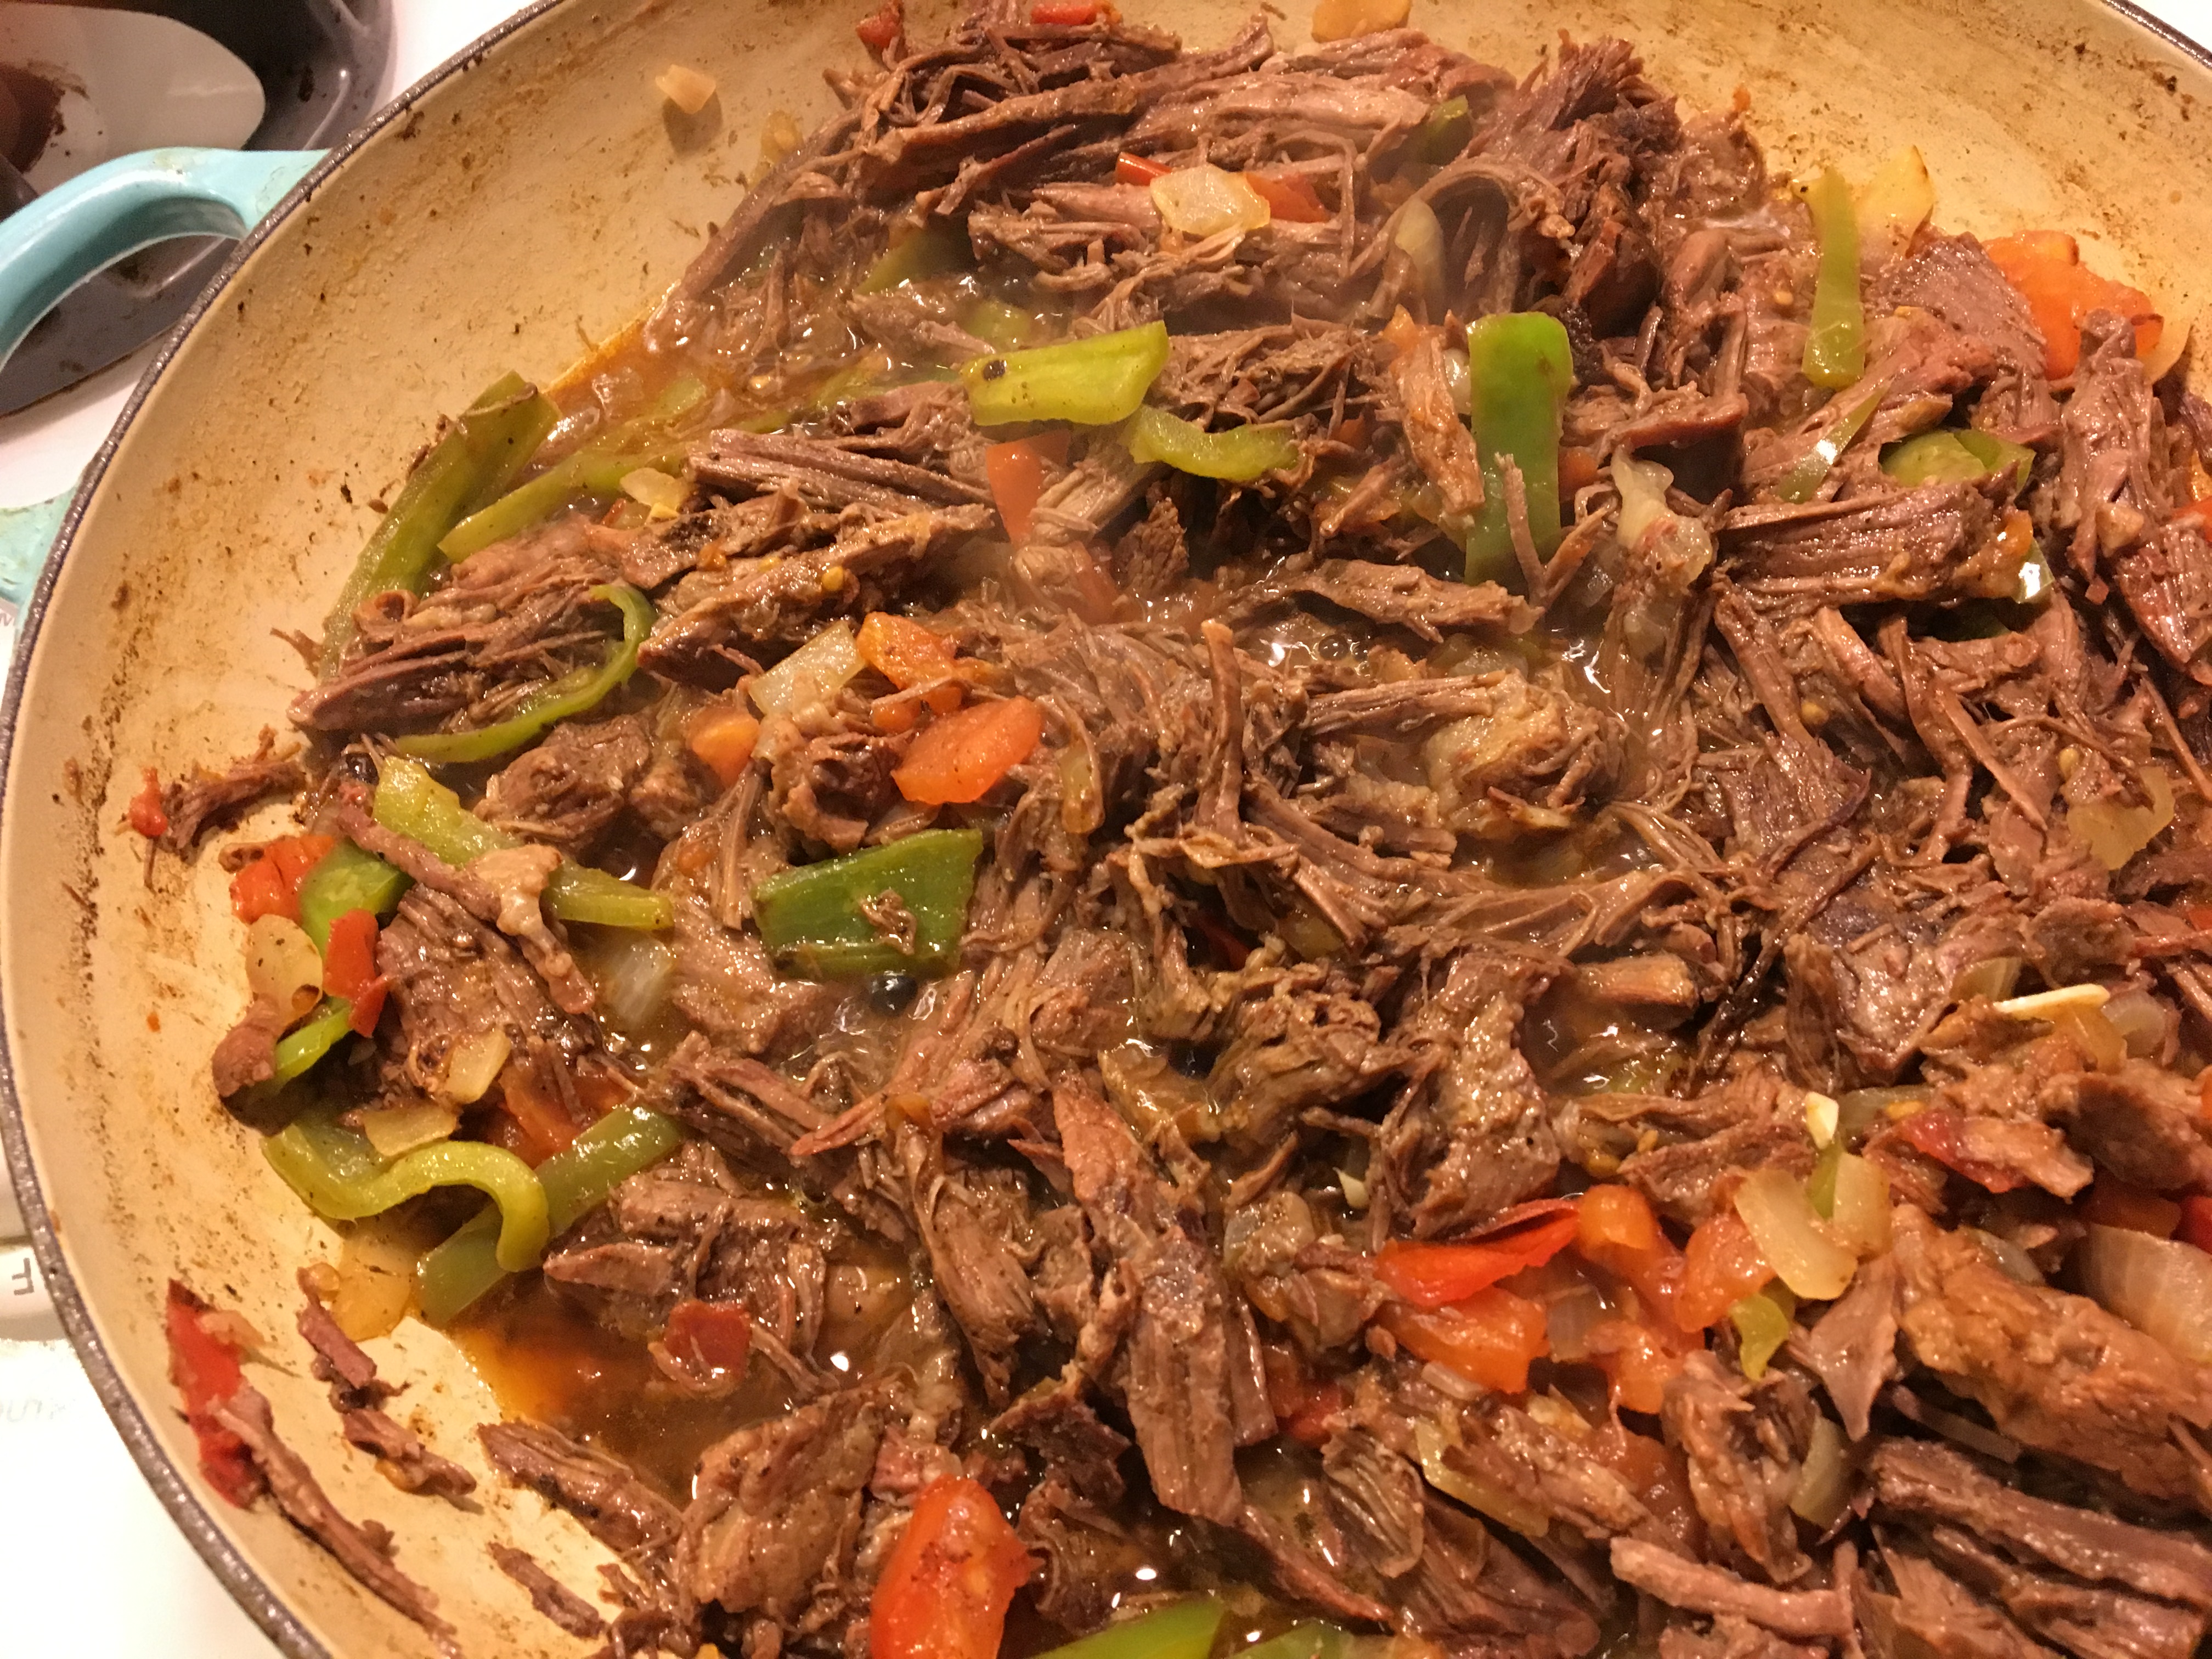
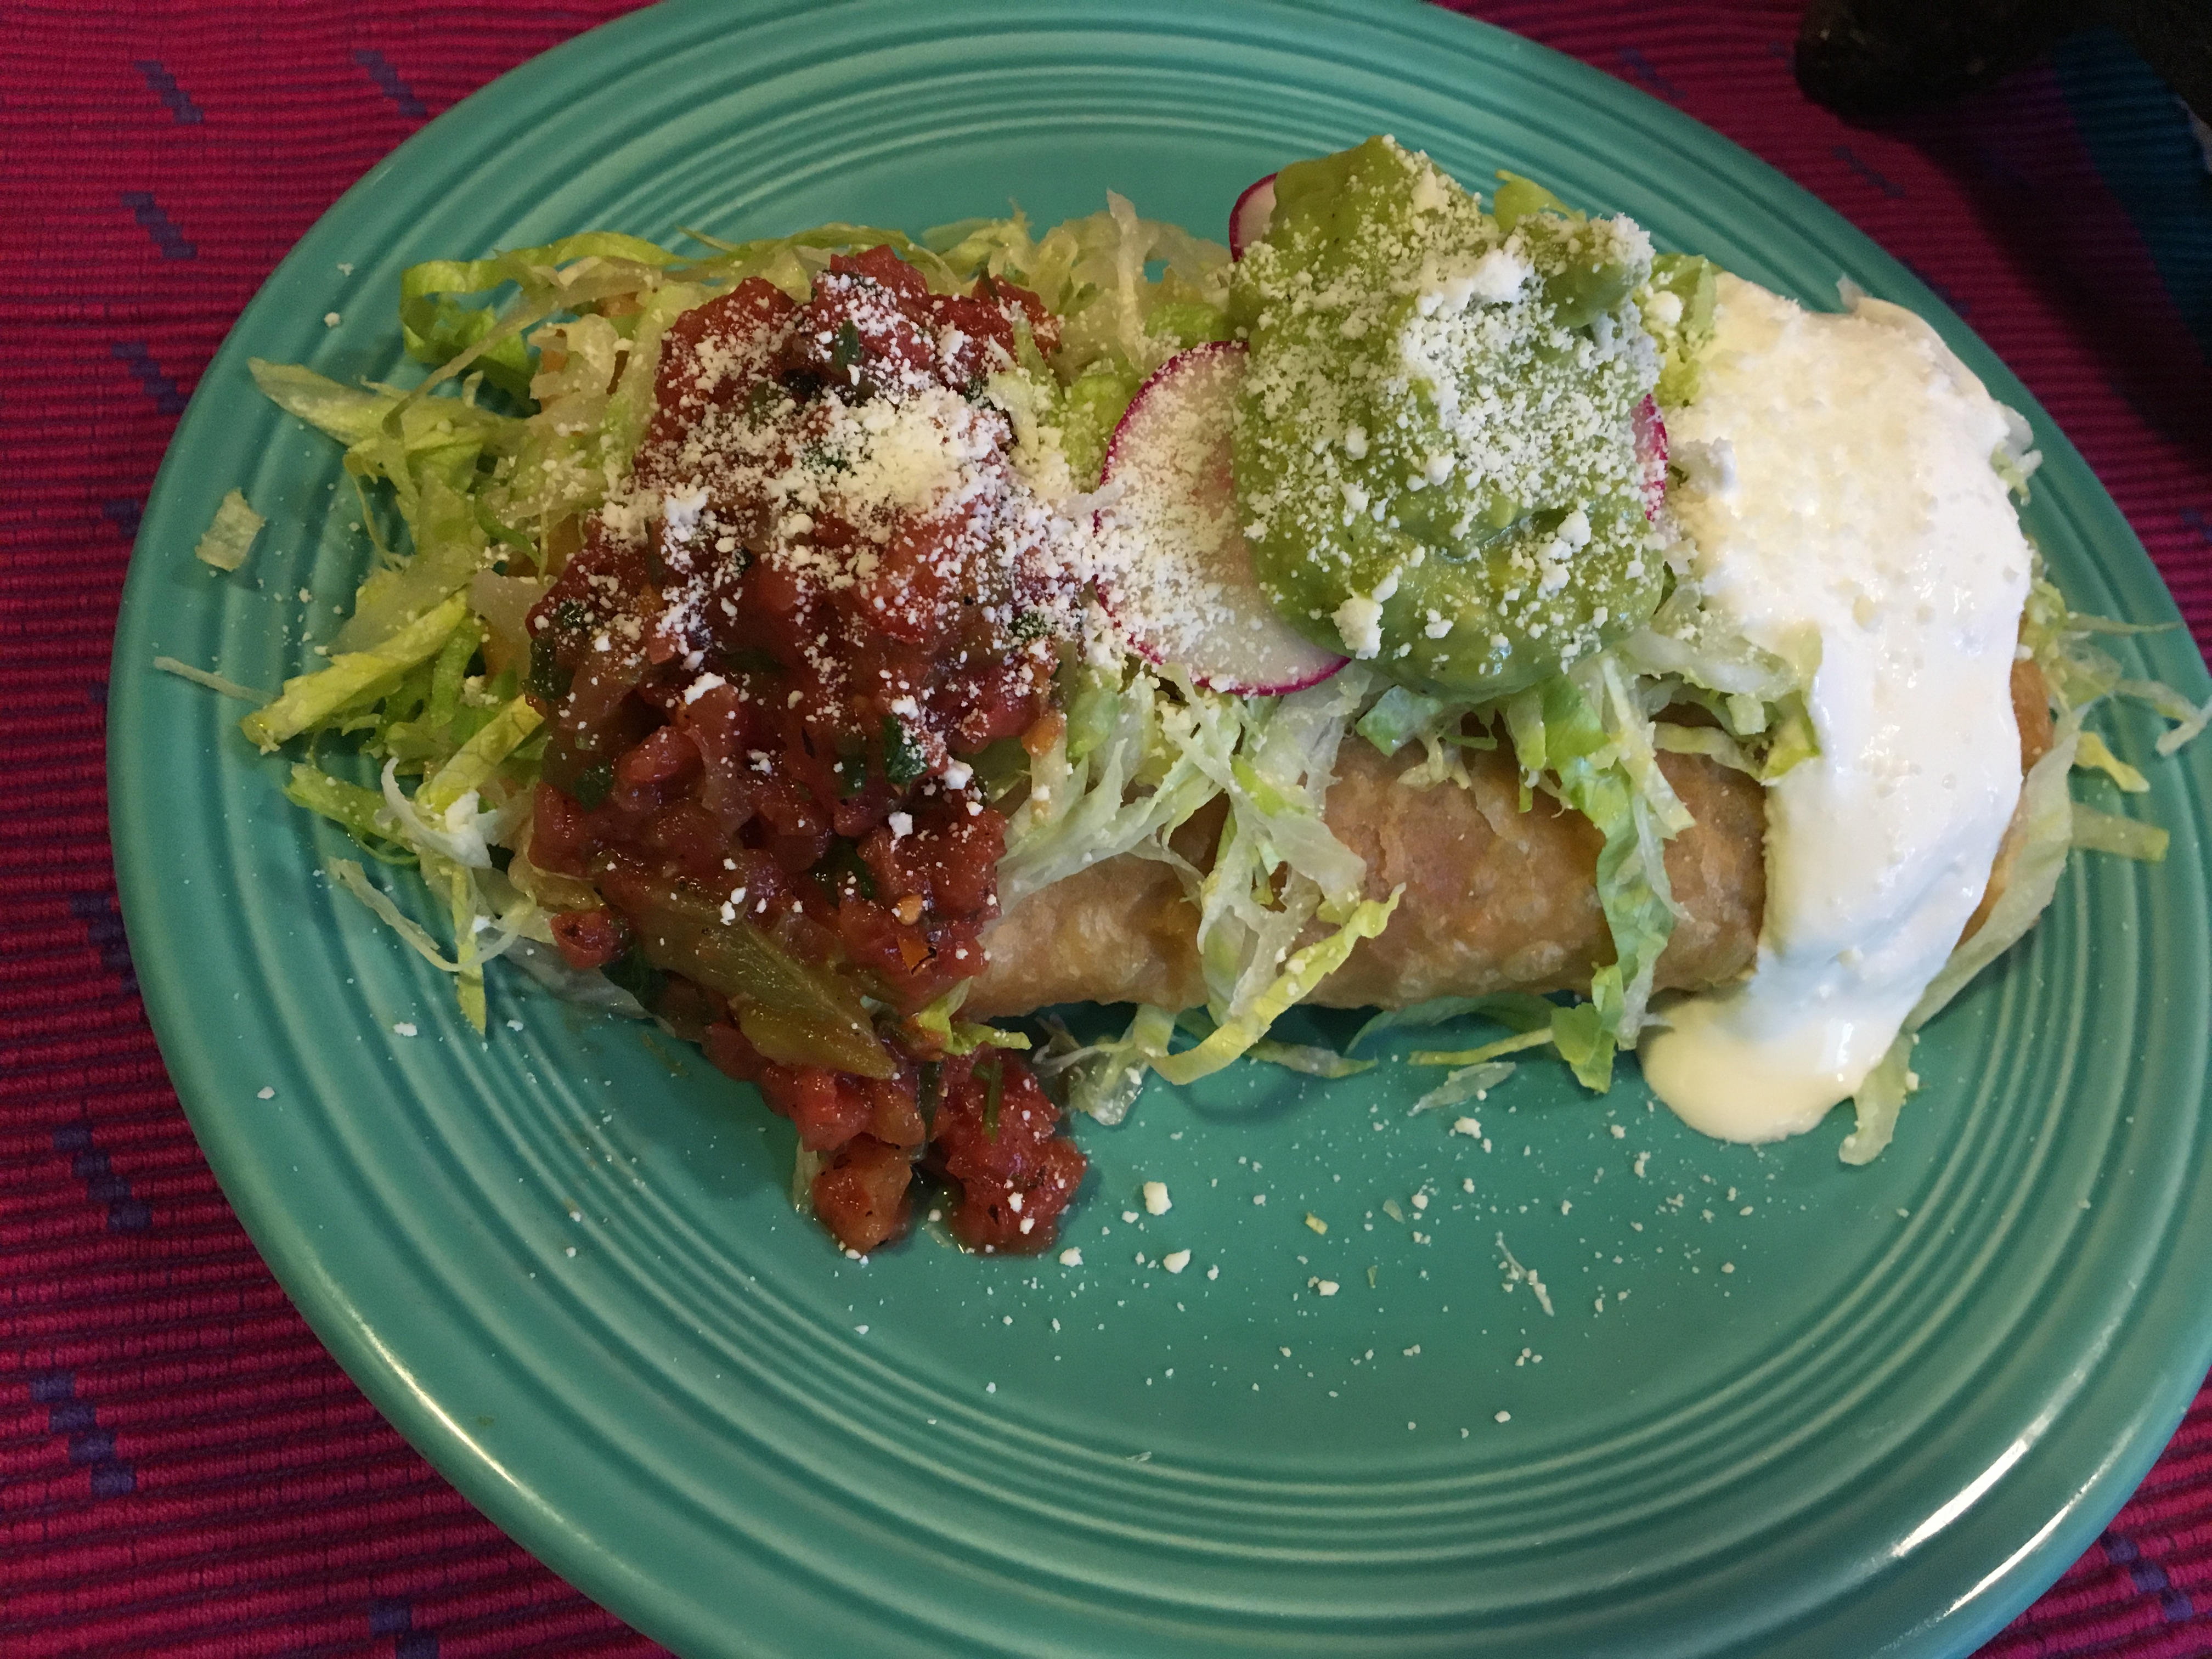
I used the machaca meat to make a chimichanga, which is essentially a deep-fried burrito.  This one was too big, I normally make them smaller than this.

Warm  your tortilla on a griddle, fill with machaca and fry in hot vegetable oil.  Make sure the oil is hot enough to quickly fry it or your chimichanga will be greasy.  When I was first learning, I would seal it with a toothpick to keep the filling from coming out.  Now, I just start the frying on the flap side of the burrito and spoon hot oil over it and it will stay closed when you flip it over.  Don’t walk away from the skillet during this part.  It is easy to scorch them and you just need a golden crust as shown in the photo.

Top your chimichanga with Rustic Tomato Salsa, finely chopped lettuce, thinly sliced radishes, guacamole and sour cream.

Enjoy!

Brrr! Time for Soup!

When my younger son visits from Kentucky, he always has a list of favorites that I’m REQUIRED to make.  This soup I made on his last visit just made the “must have” list.  Hmm, pretty soon his visits will have to be a month long!

COPYCAT ZUPPA TOSCANA

We love the soup at Olive Garden and have been happy with this acceptable copycat recipe.

Serves : 6
Prep Time: 0:35

1 lb. hot/spicy Italian sausage – crumbled (I used Johnsonville brand)
1 – 3 oz package Oscar Mayer Smoked Bacon Bits – be CAREFUL not to pour the bacon bits in and let the little moisture packet fall in the soup! (or save your cooked bacon and add)
1 qt. water
(2) 14.5 oz. cans chicken broth (I used Swanson Organic Chicken broth in the 32 oz container – use all of it)
2 lg. russet (baking) potatoes – slice in half lengthwise and then slice into ¼ inch slices
2 garlic cloves – minced
1 med. onion – chopped (about 1/3 cup)
2 cups chopped kale (cut pieces slightly larger than would fit on a spoon.  Cut the leaves off the thicker part of the stem.  Discard stems.)
1 cup heavy whipping cream
salt and pepper – to taste (heavier on pepper – it doesn’t need much salt because of the bacon)

-In a skillet over medium-high heat, brown sausage, breaking into small pieces as you fry it; drain, set aside.
-Place water, broth, potatoes, garlic, and onion in a pot; simmer over medium high heat until potatoes are tender (about 10 minutes – don’t overcook because it will be cooking an additional 10 minutes).
-Add sausage and bacon back to pot; simmer for 10 minutes.  (Skim any fat off the top that you can.)
-Add kale and cream to pot; season with salt and pepper; heat through.  Don’t boil.


IMG_1586

Drain the grease after frying

IMG_1590

Boiling the onions in the broth

IMG_1588

IMG_1589

Don’t let this little packet fall in!

IMG_1596

The finished product

UPDATE 5/1/16:  My Mom’s recipe (Anna’s Steak Ranchero) was picked by Sam Zien (Sam the Cooking Guy) to be part of his Reader Recipe Roundup!  Yay!    Sam used garlic powder instead of garlic salt (and in my opinion, you should prepare a recipe as given the first time and THEN do your modifications) and he used a different type of El Pato sauce I’d never seen before.  I put a picture up of the correct can of sauce. Someday maybe I’ll try the red can he used, which is MUCH spicier!  Anyway, here it is…hope you like it!

* * * * * * * *

Yup, that’s what my Dad used to call my Mom (Anna)…”Fastest” Cook in the West.  Now, you notice he didn’t say “Bestest” Cook in the West (and yes, Grammar Police, I know Bestest is not a word! Ha Ha!)  My Mom is a “good” cook but not what we would call a “great” cook.  She always worked while we were growing up.  She was a “Girl Friday” at a local newspaper, became a social reporter and eventually a columnist.  That kept her pretty busy so by the time she got home, she needed to whip something up quickly for her hungry brood.

This dish was one of her standbys.  It was relatively cheap (beef wasn’t outrageously priced like it is now), it was simple and it was quick.  This could be ready to eat in about 20 minutes but it tastes better if you let it simmer for at least a half hour and even better after an hour.

(Did you ever notice that the 3 basic ingredients that are used in a LOT of Mexican dishes are the same colors as their National Flag?  I just did…)

IMG_9769

ANNA’S STEAK RANCHERO

1 1/2 lbs Sirloin Steak

1/2 large green bell pepper, chopped

1/2 large white onion, chopped

1 tomato, chopped

1 8 oz can tomato sauce

1 8 oz can El Pato tomato sauce

Garlic Salt

Salt and Pepper to taste

Slice your sirloin into thin strips (across the grain for tenderness).  Saute in 2 TBSP vegetable oil until most of the pink is gone.  Add vegetables, seasonings and sauces.  Season with Salt and Pepper.  Cover and let simmer 20-30 minutes on low.  In the last 5 minutes, you can add chopped cilantro if you want.  This tastes even better the longer you let it simmer and is great for leftovers.  Serve with Spanish rice (look in the search box above to get my recipe – it is in the post for Albondigas soup) and refried beans and flour tortillas.

Sirloin Steak

Sirloin Steak

Slice into thin strips

Slice into thin strips

Saute in 2 Tbsp vegetable oil.

Saute in 2 Tbsp vegetable oil.

Season with a few sprinkles of garlic salt and salt/pepper

Season with a few sprinkles of garlic salt and salt/pepper

IMG_9778

1 regular tomato sauce and 1 spicy tomato sauce

1 regular tomato sauce and 1 spicy tomato sauce

The finished product!

The finished product!

After it simmers more, the meat becomes more tender.

After it simmers more, the meat becomes more tender.

Spanish Rice is a good accompaniment, along with refried beans.

Spanish Rice is a good accompaniment, along with refried beans.

So….tell me about your QUICK and EASY “go-to” recipe!

Yesterday we joined my sister and her husband at the Vista Strawberry Festival.  It is a 45 minute drive to Vista but it’s always worth it to enjoy the abundance of fresh fruit, the company of my sis & her husband and of course, delicious strawberries!   https://www.facebook.com/VistaStrawberryFestival.

IMG_8398

There were booths with Strawberry Pizza, Strawberry Lemondade, Strawberry Shortcake (the classic dessert), Chocolate-dipped Strawberries as well as things that had strawberry as an ingredient such as Strawberry Vinegar, Strawberry Chutney, etc.  My husband was tempted by the Strawberry Frosted Cupcakes and Strawberry Funnel Cakes but we still had a dinner to prepare at my sister’s house.

BUT, before we left, we DID enjoy some food from a vendor called Rollswisserie who had a big PORCHETTA sign above their booth.  They had these rotisseries full of chicken and ribs but the real heavenly offering was Porchetta which is pork tenderloin covered in pork belly stuffed with an herb mixture (secret recipe) cooking slowly and methodically on this innovative mobile rotisserie. The Porchetta is shown behind the ribs on this photo of the rotisserie.  If I had a list of the 10 best things I ever ate, that pork would be on it.  We bought 2 lbs to bring home and I am going to try to dissect what herb mixture is in the pork.

IMG_8391

.  Here is a photo of the roasted chicken plate with red potatoes and broccoli/zucchini spaghetti mixture.  Delicious!

IMG_8390

Here is a photo of the delicious, flavorful cherries from Watsonville.  Perfect candidates for a clafouti.  This is what’s left of the avocados we picked up.  So buttery and flavorful.  And I’ve already made 2 batches of freezer jam.  Yum!

IMG_8396

I wished I would have taken some pictures of the delicious dinner my sister prepared for us.  Homemade tomatillo salsa and carne asada and chicken and guacamole and spanish rice and red salsa and, and, and…so much good food.  My contribution was to make some Special Quesadillas.

IMG_8394

Take some raw, uncooked tortillas and brush water around the edges.  Fill with a handful of shredded Queso Quesadilla (or Monterey Jack if you can’t find QQ).  Pinch and roll the edge to seal in the filling and quickly fry in a pan of hot vegetable oil  Spoon some hot oil over the rim to cook the edges while the bottom is cooking.  These are delicious served with Chile Relleno sauce (tomatoes sauteed with onions, garlic, bell pepper and a serrano chile).  Happy times!

Just a few more days until Thanksgiving and I know that there are a lot of young cooks out there scrambling about and searching the internet for tips and tricks on how to cook their turkey, etc.  I just wanted to post a couple of quick links to previous posts I’d made that might be helpful.   I also found some other recipe ideas that I might try and maybe you might want to check them out for ideas, too.

1)  I previously wrote about my use of a Roaster as an accessory to cook your turkey in so that you could free up your oven for the side dishes.  You can find that here:

https://ablogaboutfood.wordpress.com/2009/11/10/roasting-turkey-in-a-roaster/

Turkey day

2) For hints about making rolls from scratch (a WONDERFUL tradition to start), you can find the recipes and step-by-step instructions here:  https://ablogaboutfood.wordpress.com/2008/10/29/thanksgiving-dont-show-up-without-the/

OLYMPUS DIGITAL CAMERA

3)  I found this post about some easy looking biscuits that I might want to try.  They look easy-peasy!  http://www.thecountrycook.net/2012/02/butter-dip-biscuits.html

4)  And last, I will try and get the pics and recipe up for my Mom’s cranberry salad this year but in the meantime – this is definitely on my list of side dishes to try in a pinch:  Cranberry mandarin sauce: –  http://siggyspice.blogspot.com/2010/11/thanksgiving-side-dish-extravaganza.html

Here’s what my family USUALLY has as their Thanksgiving menu:

Turkey (Gotta be a Butterball!)

Ham

Mashed Potatoes

Gravy

Mom’s Cranberry Salad

Green Bean Casserole

Yams (mashed with brown sugar/pecan topping)

Strawberry Jello Salad

Ambrosia

Homemade Yeast Rolls

What’s on your “must have” list?